
News
The Tech Photographer
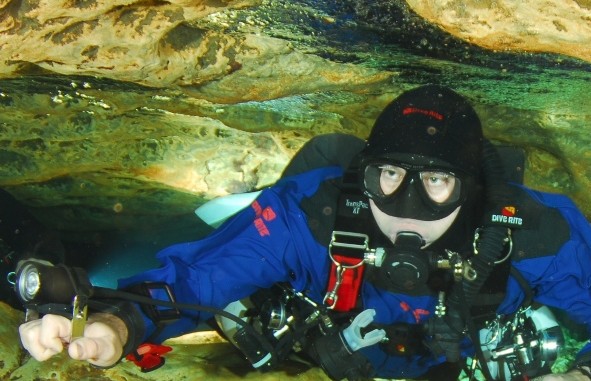
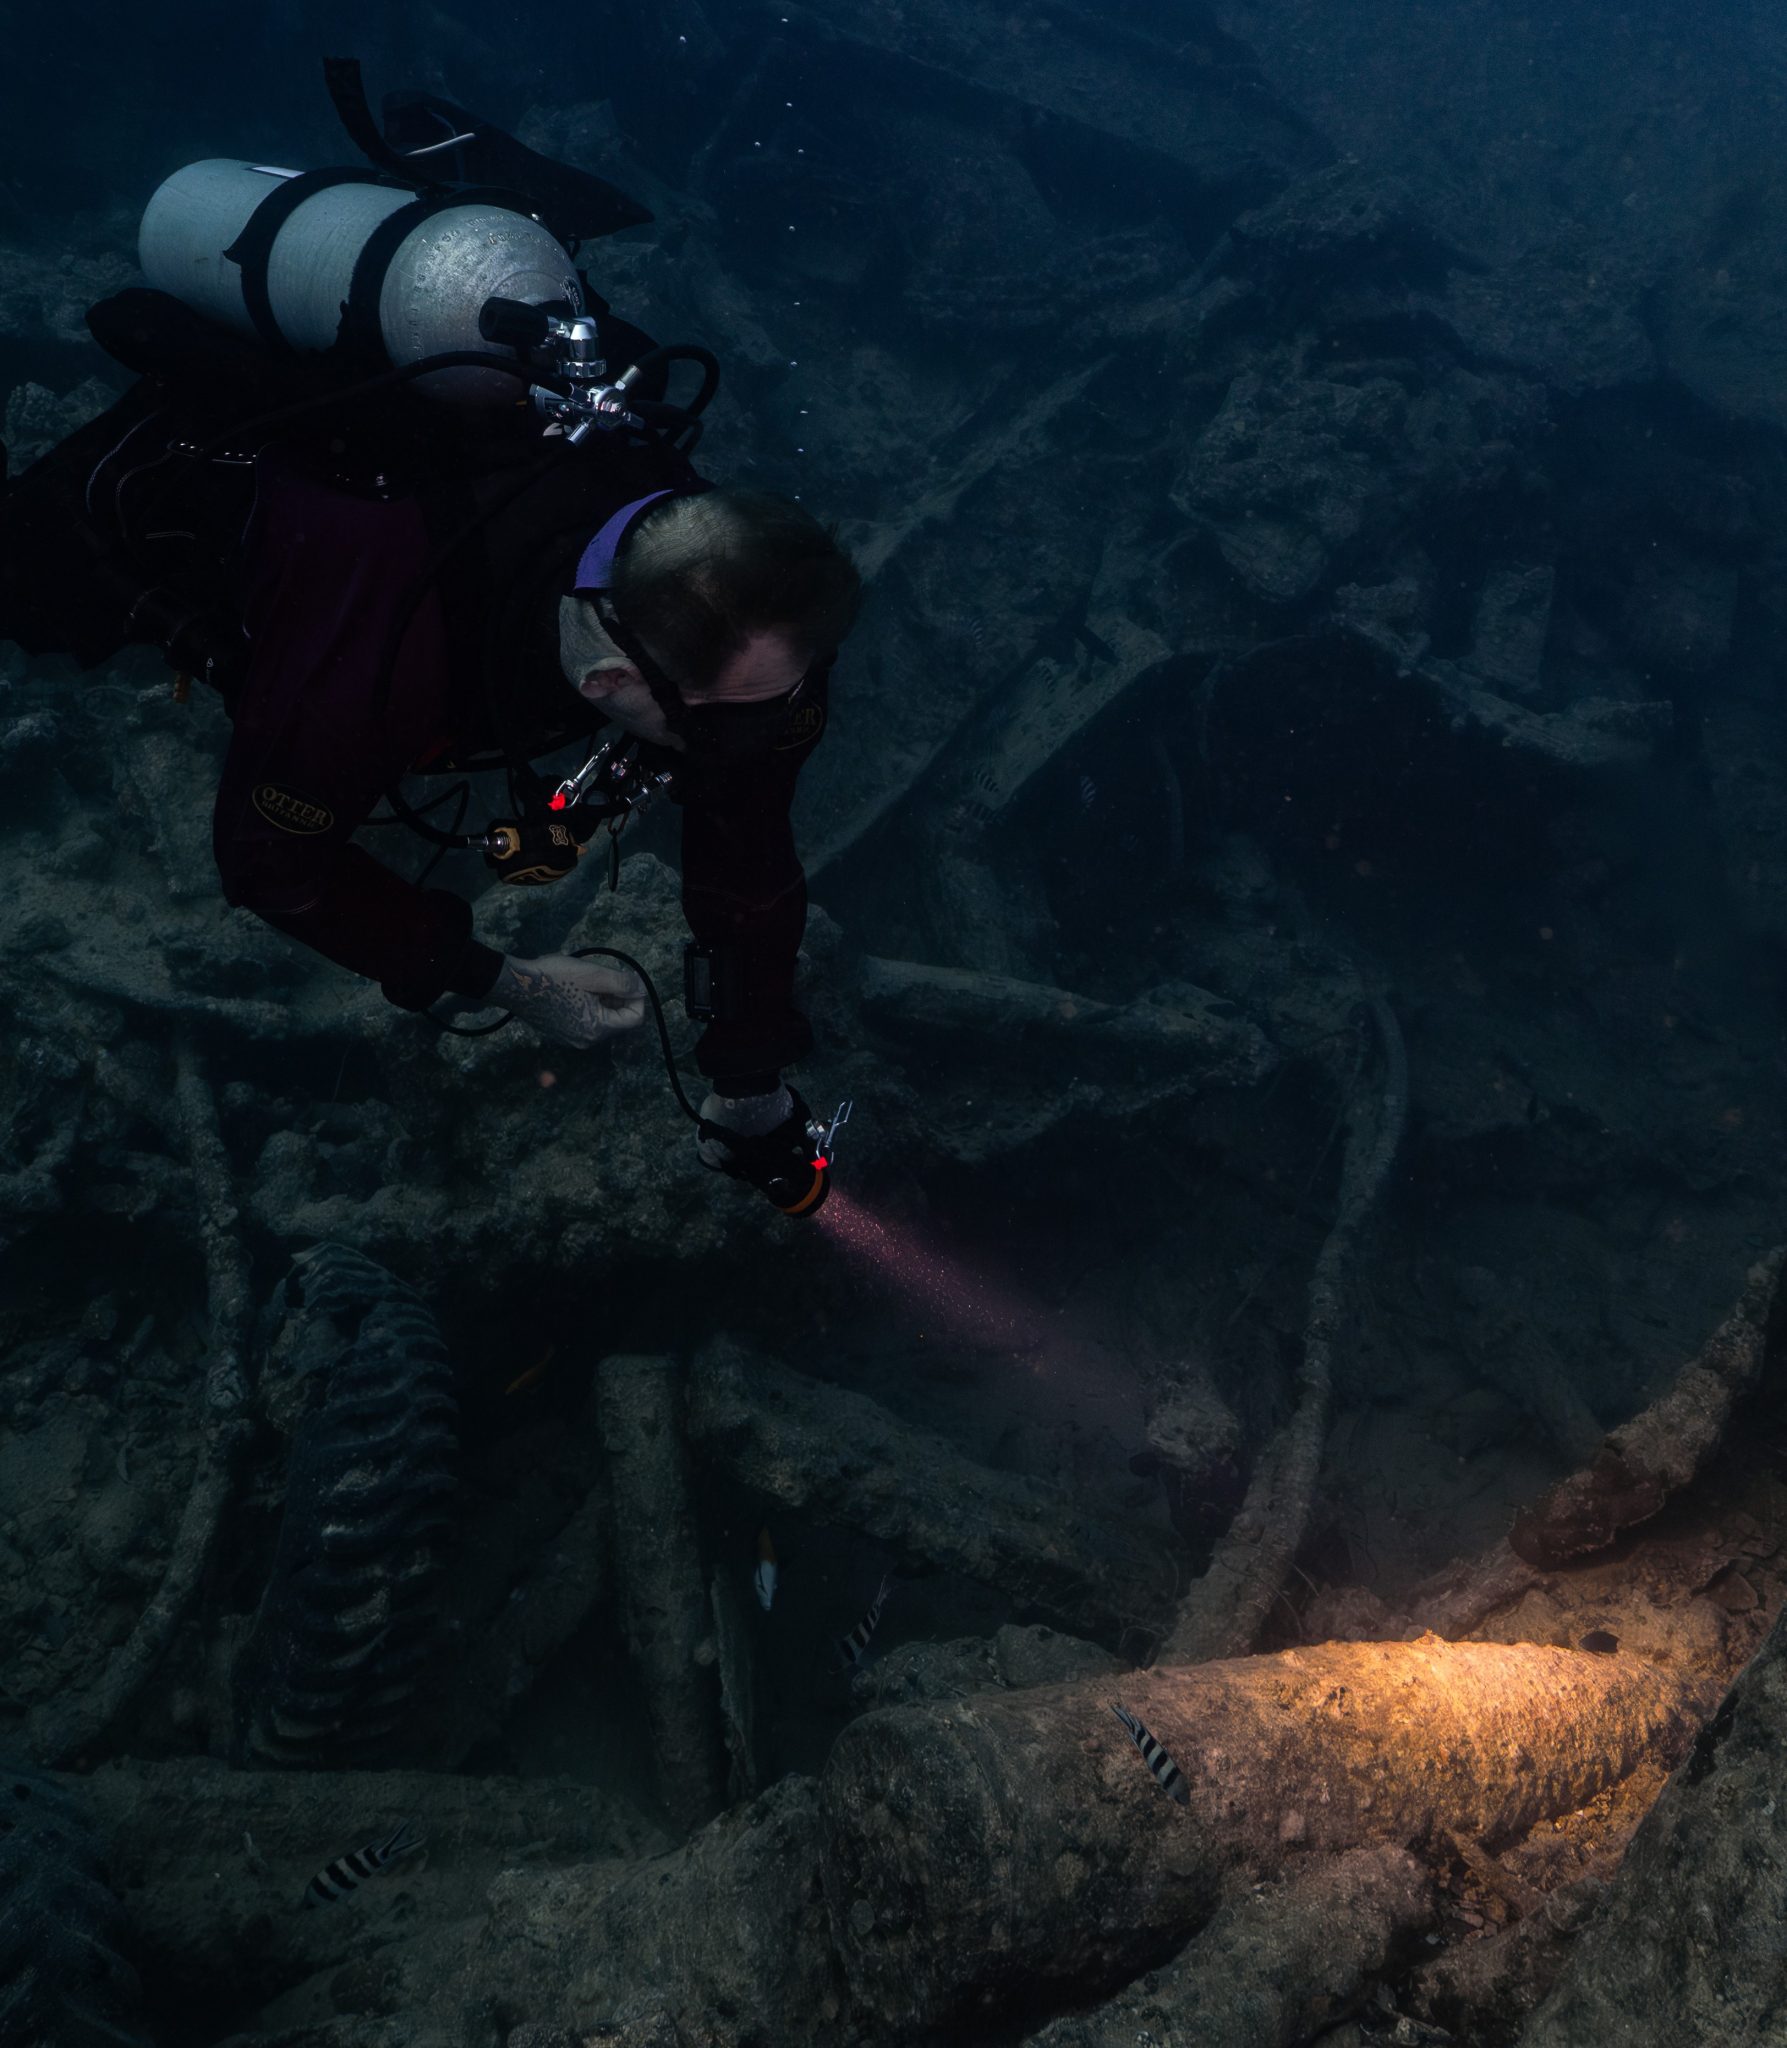
Many of Today’s divers are engaged in “technical “diving. Simply stated, “any dive in which a diver cannot surface immediately and directly to the surface, is performing a tech dive”. It may be necessary to switch to different breathing mixtures or work with computers that need to have gas changes accomplished during hang times. CCR Divers are always aware and monitoring the PO2 within the loop. These factors increase work load, distractions and can create stress at varying individual levels. Carrying the extra load of double tanks and stage bottles or bail out bottles for CCR divers causes even more drag. Now add a camera into the whole mix. Before you decide just to “grab and go” do not bring a camera into any situation that you have not encountered before; plan your dive carefully.
Carrying a camera can be considered task loading on just about any dive. Why? It’s simple. The diver has just lost the use of one hand. Access to all equipment will have to be accomplished without damaging that expensive piece of photo gear. It may be necessary to cut or remove a piece of monofiliment. It is simple enough to do when both hands are free; however, if the cutting shears are placed where only your right hand can reach them and the camera is now occupying this hand? How do you cut the line in a ripping current when the left hand is now holding you in position? What do you do? Consider reconfiguring your equipment, and packing a second cutting tool.
Photographers occasionally, however improperly, disregard their planned dive profile or run low on air/gas. The following statements are commonly used for justification. “I had to hang because I wanted the shot and had to wait for the right conditions,” or “ I wasn’t paying enough attention to my air supply because I was to busy taking pictures.” Photography is never an excuse to disregard proper dive safety protocols. Buoyancy control is very important not only for reducing the possibility of silting out the photo but also energy and environmental conservation. A diver that is neutrally buoyant expends less energy and reduces gas consumption. The following areas are just two of the many “tech” situations that a photographer may encounter:
Cave Diving
Diving and exploring the subterranean world of an underwater cave takes special training, skills and equipment. An adequate gas supply or appropriate bailout for CCR divers, backup lights and the necessary reels needed to safely navigate this environment quickly take up all available body space. One hand will be occupied with the primary dive light and the second hand may be needed to pull through a strong current. An inefficient fin technique will only tire the diver, so where does the camera go? First of all, the camera should be left behind until this area has been dived by the photographer beforehand (exploration divers are of a different skill set and take years of preparation). Strobe lighting is essential and multiple strobes are considered standard. Is the cave opening large enough? Sidemount explorers may have to change their approach in order to get the diver and camera through a two-foot wide crack in the earth!
Following a dive plan that has been agreed to will be required if the photographer expects results. After the site has been chosen and a decision made on what subject will be photographed, the divers will have to get into the cave. High flow areas may require modifying techniques. One technique is to allow the diver without the camera to lead the dive. The lead diver can actually deflect part of the strong flow. The photographer will have to stay close behind to take advantage of the flow deflection. An errant kick however can be devastating to a camera system. The photographer will not only have to protect the camera from his dive buddy but maneuver in such a way as to avoid slamming it into the bottom or the cave walls. Once inside it will be necessary to swim with a light and camera system at the same time. Attaching a primary light to the camera system is one technique or using a “Goodman style handle” on the light will allow the diver to hold the camera and light at the same time. Navigating through very tight areas may require reconfiguring equipment and thinking. Sidemount diving has gained much attention of late. In this situation the tanks are moved from the divers back and are mounted along side the body. Air management is even more critical since the entire air supply is not accessible from one regulator. This type of diving will require multiple regulator exchanges during the dive. This configuration should not be attempted without proper training and practice. Placement of camera lanyards must not interfere with regulator access. In this case it may be best to dispense with any lanyard to avoid entanglement with regulator hoses. Multiple strobe systems may not work in tight areas because the strobe arms cannot be extended properly. Large flexible arms may be small enough to negotiate cramped passages. As simple detachable strobe arm system may be a better choice. It is important to have a pre-dive briefing explaining when and how the photo is to be attempted. You may wish to have your buddy carry and position the secondary slave strobe in order to achieve results in tight places. Practice the photo in a simple situation first. Local quarries have easily accessed areas, such as school buses. This will allow planning and practice in a low stress environment. Most digital strobes have sensors that will pick up the primary strobe flash. However it may be necessary to add a sensor cord to help the strobe “see” the primary flash.
Many divers are using Nitrox as a breathing medium and a second gas with a higher percentage of oxygen to assist in decompression. Cave divers leave “deco” bottles at the cave entrance where decompression stops will be done. Some buddy teams work with the photographer allowing his buddy to carry his/her deco gas into the cave while they manage the camera system. It is the photographers’ responsibility to ensure their deco bottle is placed properly and secured.
Wreck Diving
Exploring shipwrecks in deeper water for longer periods of time has become commonplace for the advanced wreck fraternity. Cold-water explorers already know how thick gloves hinder movement and dexterity. Many divers find themselves needing deco stops that will require maintaining proper depth in current or wave action, occasionally both, unlike cave divers that more often than not put a camera down and free up both hands. Wreck divers will be hanging in open water and may have to stay close to or hold onto the anchor line while maintaining neutral buoyancy. Wrist lanyards can be uncomfortable because of the extra weight and drag on the arm. This can be fatiguing and can interfere with gear management. Computers that require manual changes may be difficult to work with unless the camera system is “clipped” off and allows the use of both hands. Accessing a second regulator with one hand holding the anchor line and a camera interfering with the other can turn into a nightmare. CCR divers have a whole set of protocols that require diligence and dexterity. Remember in this situation, neutral buoyancy will be important to maintain a consistent depth for decompression. Having the camera clipped off to a separate ring and a lanyard long enough not to interfere with other equipment is the best solution. Lanyard length is determined while the diver is in the prone horizontal position. Wrist mounted computers tend to work the best, and having the ability to have both hands free on occasion will make the dive more enjoyable.
Selecting the type of camera system that will work for the planned dives are just as important. Housed systems are bulkier to work with in the water and create more drag, therefore more fatigue. Aluminum housings tend to have deeper working ranges than plastic housings. It is best to check with the manufacturer for the maximum working depth of the equipment. Although the camera system may be rated to 200 feet it may impossible to use the housing effectively past 150 feet. Extreme temperature changes can cause fogging inside the housing. The use of a desiccant will alleviate the problem. The attachment clip should be of a style that can be released with one hand and is different that any other clip. After surfacing it would be best to hand the camera system up to someone on the boat.
Working with multiple strobes is not as difficult as it appears. Here are a few tips:
- Exposure is based on the strongest light source. The strobes on the camera will illuminate objects closest to the camera. Slave strobes are considered fill lighting.
- Do not allow the slave strobe to point directly into the camera lens. The bright direct flash at close range WILL affect exposure.
- Provide some type of a handle for your dive buddy to work with, and some type of clip. A strobe handle works but a dedicated handle works best.
- Bright sunlight will affect the slave sensors ability to “see” the primary strobe. Therefore it may require practice in positioning in shallow water.
- Pre-plan the dive but allow for critical thinking. This is a three dimensional dynamic environment; things change.
- Bring a slate and use it! This will save time and make communication clear and quick.
This probably sounds like a lot of work……well, it is! This is the reason that any dive of this nature should be planned out and discussed beforehand. If you don’t know the dive or the gear, leave the camera behind. Work as a team to achieve the best results!


Free Octopus with every purchase of a SCUBAPRO regulator system
Just in time for the spring season, divers can save money with the FREE OCTOPUS SPRING PROMOTION! Until July 31st SCUBAPRO offers an Octopus for free
with every purchase of a regulator system!
Get a free S270 OCTOPUS with purchase of these combinations:
MK25 EVO or MK19 EVO with A700
MK25 EVO or MK19 EVO with S620Ti
MK25 EVO or MK19 EVO with D420
MK25 EVO Din mit S620Ti-X
Get a free R105 OCTOPUS with purchase of the following combinations:
MK25 EVO or MK19 EVO with G260
MK25 EVO or MK17 EVO with S600
SCUBAPRO offers a 30-year first owner warranty on all regulators, with a revision period of two years or 100 dives. All SCUBAPRO regulators are of course certified according to the new European test standard EN250-2014.
Available at participating SCUBAPRO dealers. Promotion may not be available in all regions. Find an authorized SCUBAPRO Dealer at scubapro.com.
More information available on www.scubapro.com.
Jake Davies boards Ghazala Explorer for an unforgettable Red Sea diving experience…
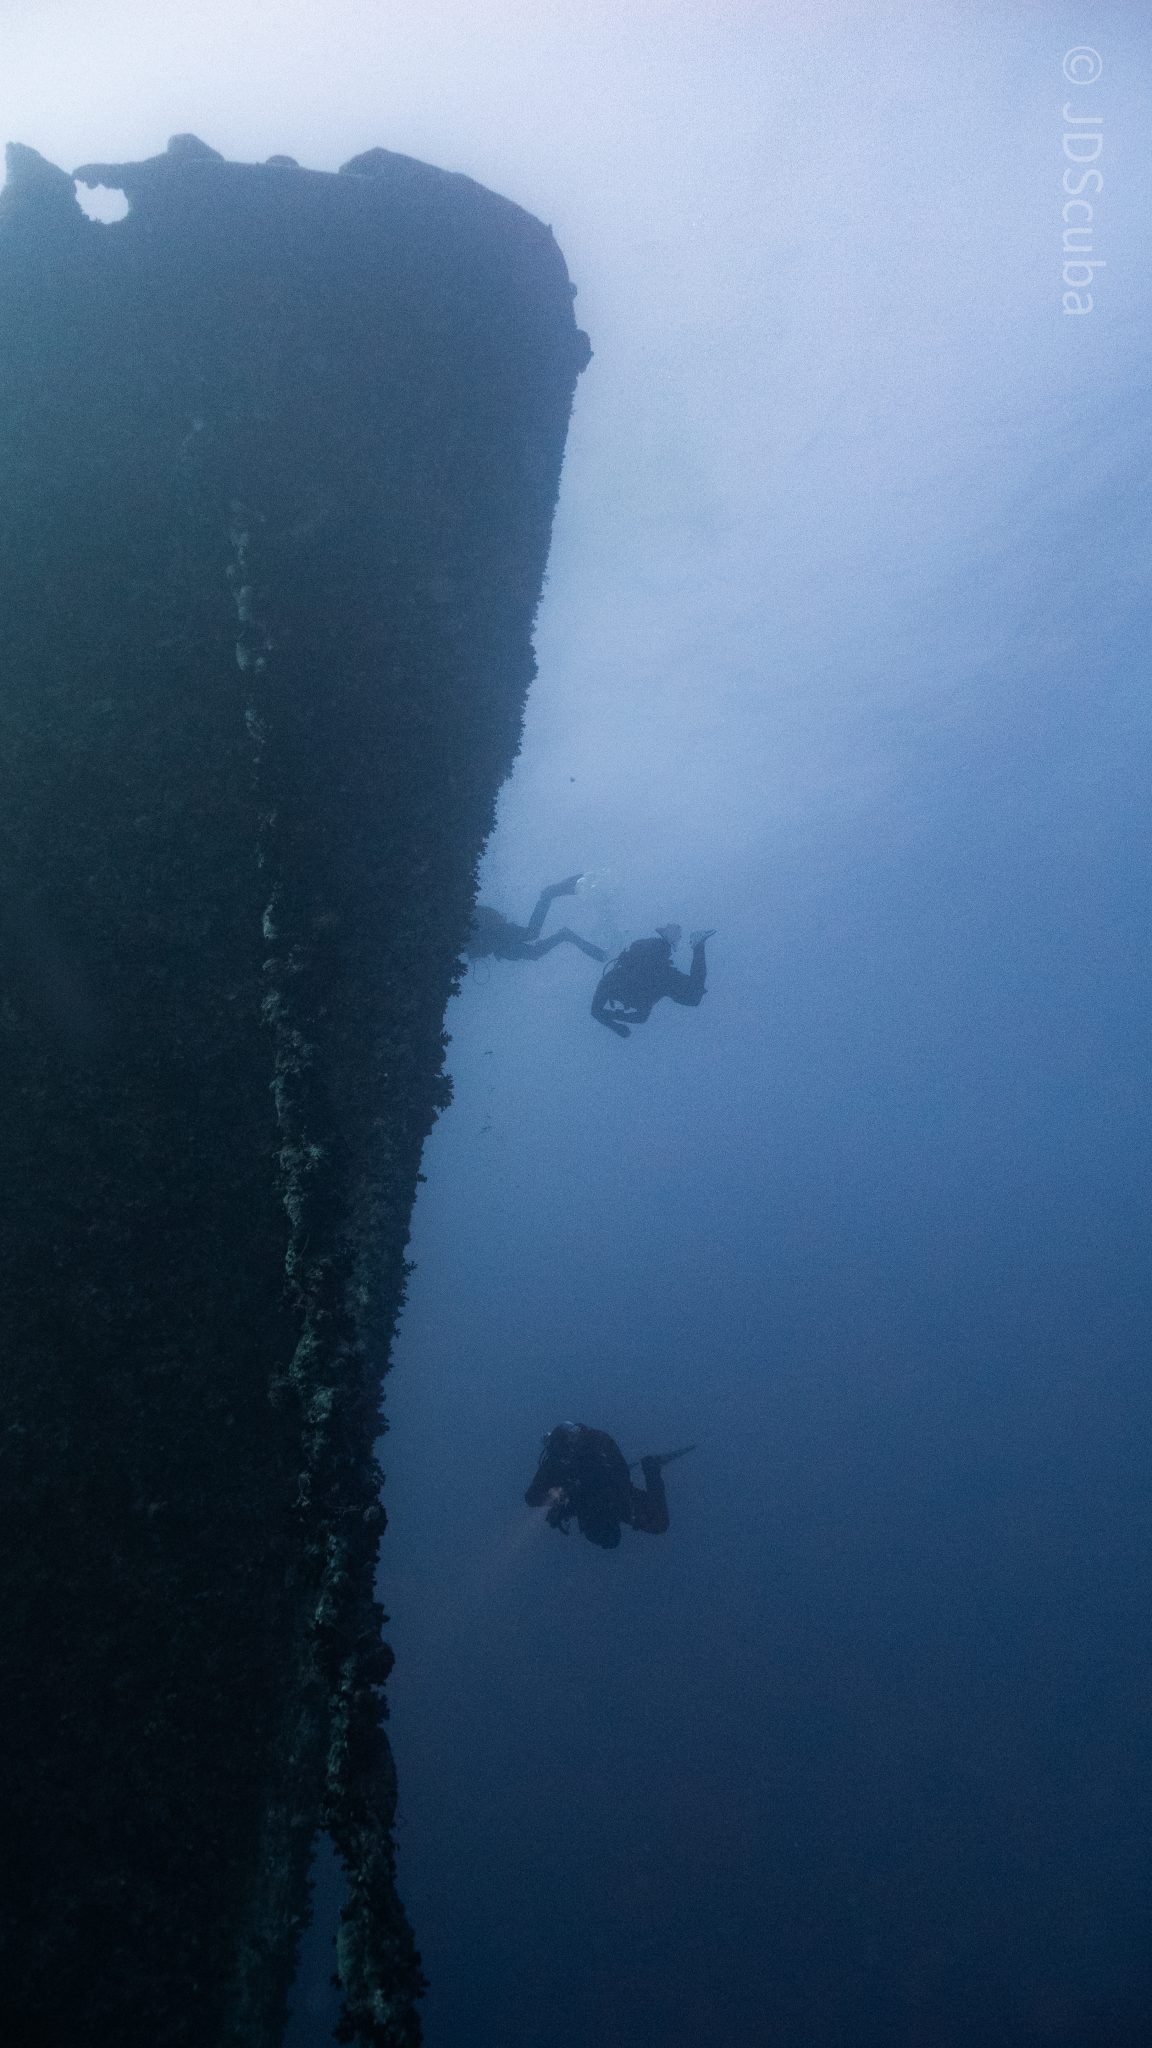
Overnight, the wind picked up, making the planned morning dive a bit bumpy on the Zodiacs to the drop point on Thomas Reef. There, we would dive along the reef before descending through the canyon and then passing under the arch before ascending the wall with a gentle drift. The site provided great encounters with more pelagic species, including shoals of large barracuda, tuna, and bigeye trevally.
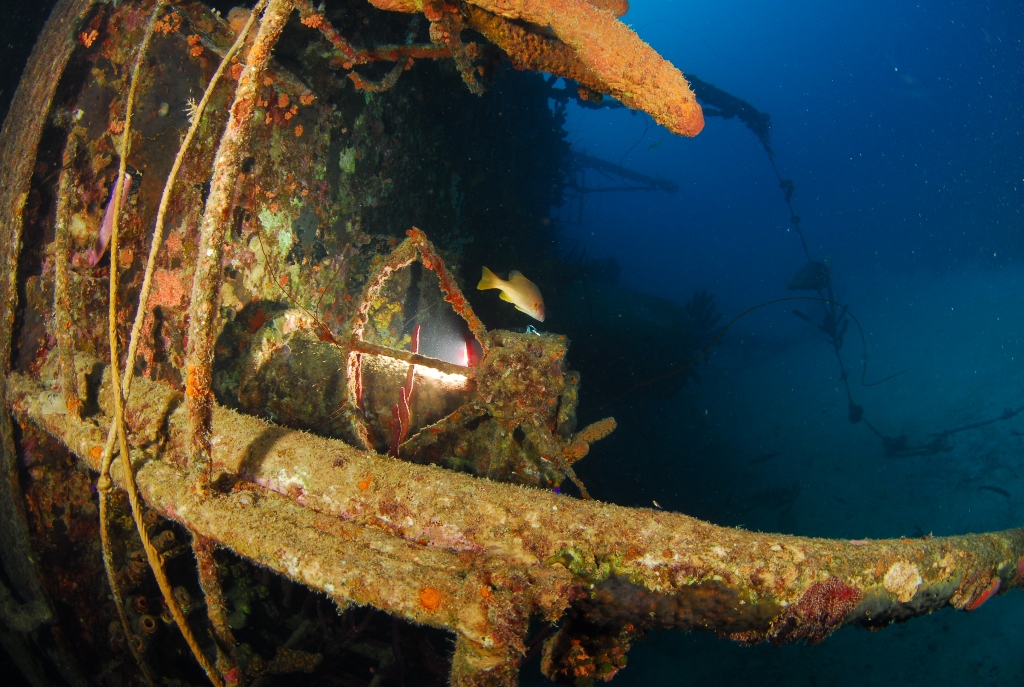
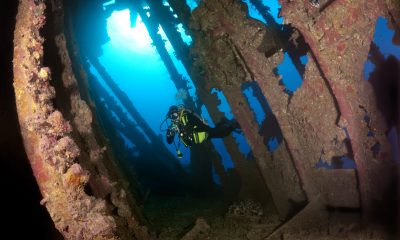
Once back on the boat, it was time to get everything tied down again as we would head back south. This time, with the wind behind us, heading to Ras Mohammed to dive Jackfish Alley for another great gentle drift wall dive before then heading up the coast towards the Gulf of Suez to moor up at the wreck of the Thistlegorm. This being the highlight wreck dive of the trip and for many onboard, including myself, it was the first time diving this iconic wreck. I had heard so much about the wreck from friends, and globally, this is a must on any diver’s list. Fortunately for us, there was only one other boat at the site, which was a rarity. A great briefing was delivered by Ahmed, who provided a detailed background about the wreck’s history along with all the required safety information as the currents and visibility at the site can be variable.
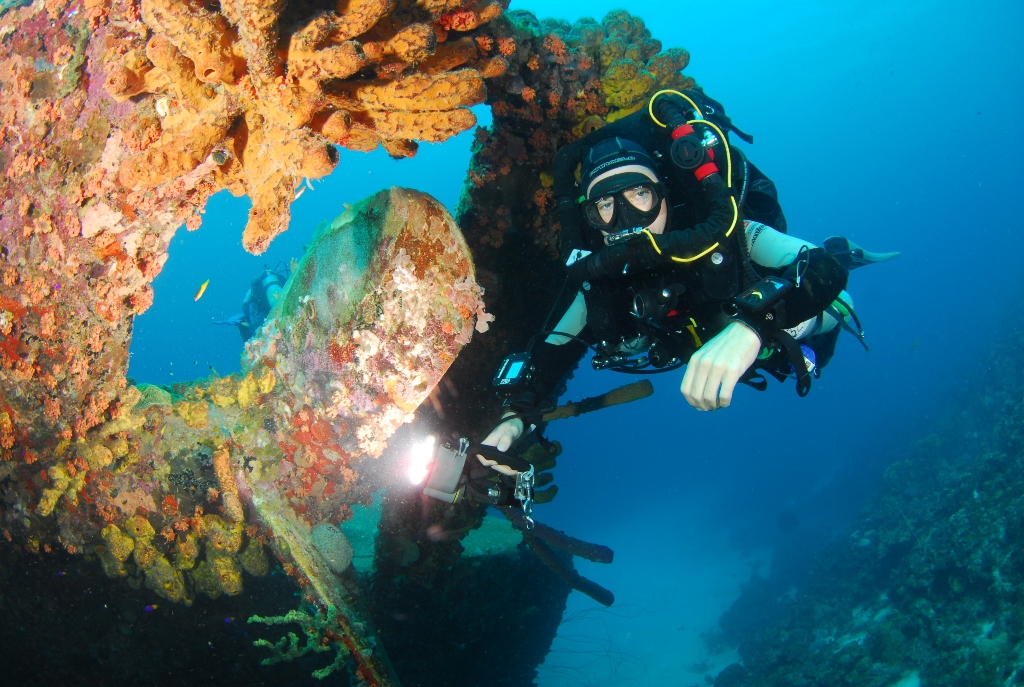
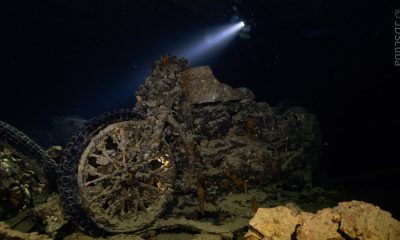
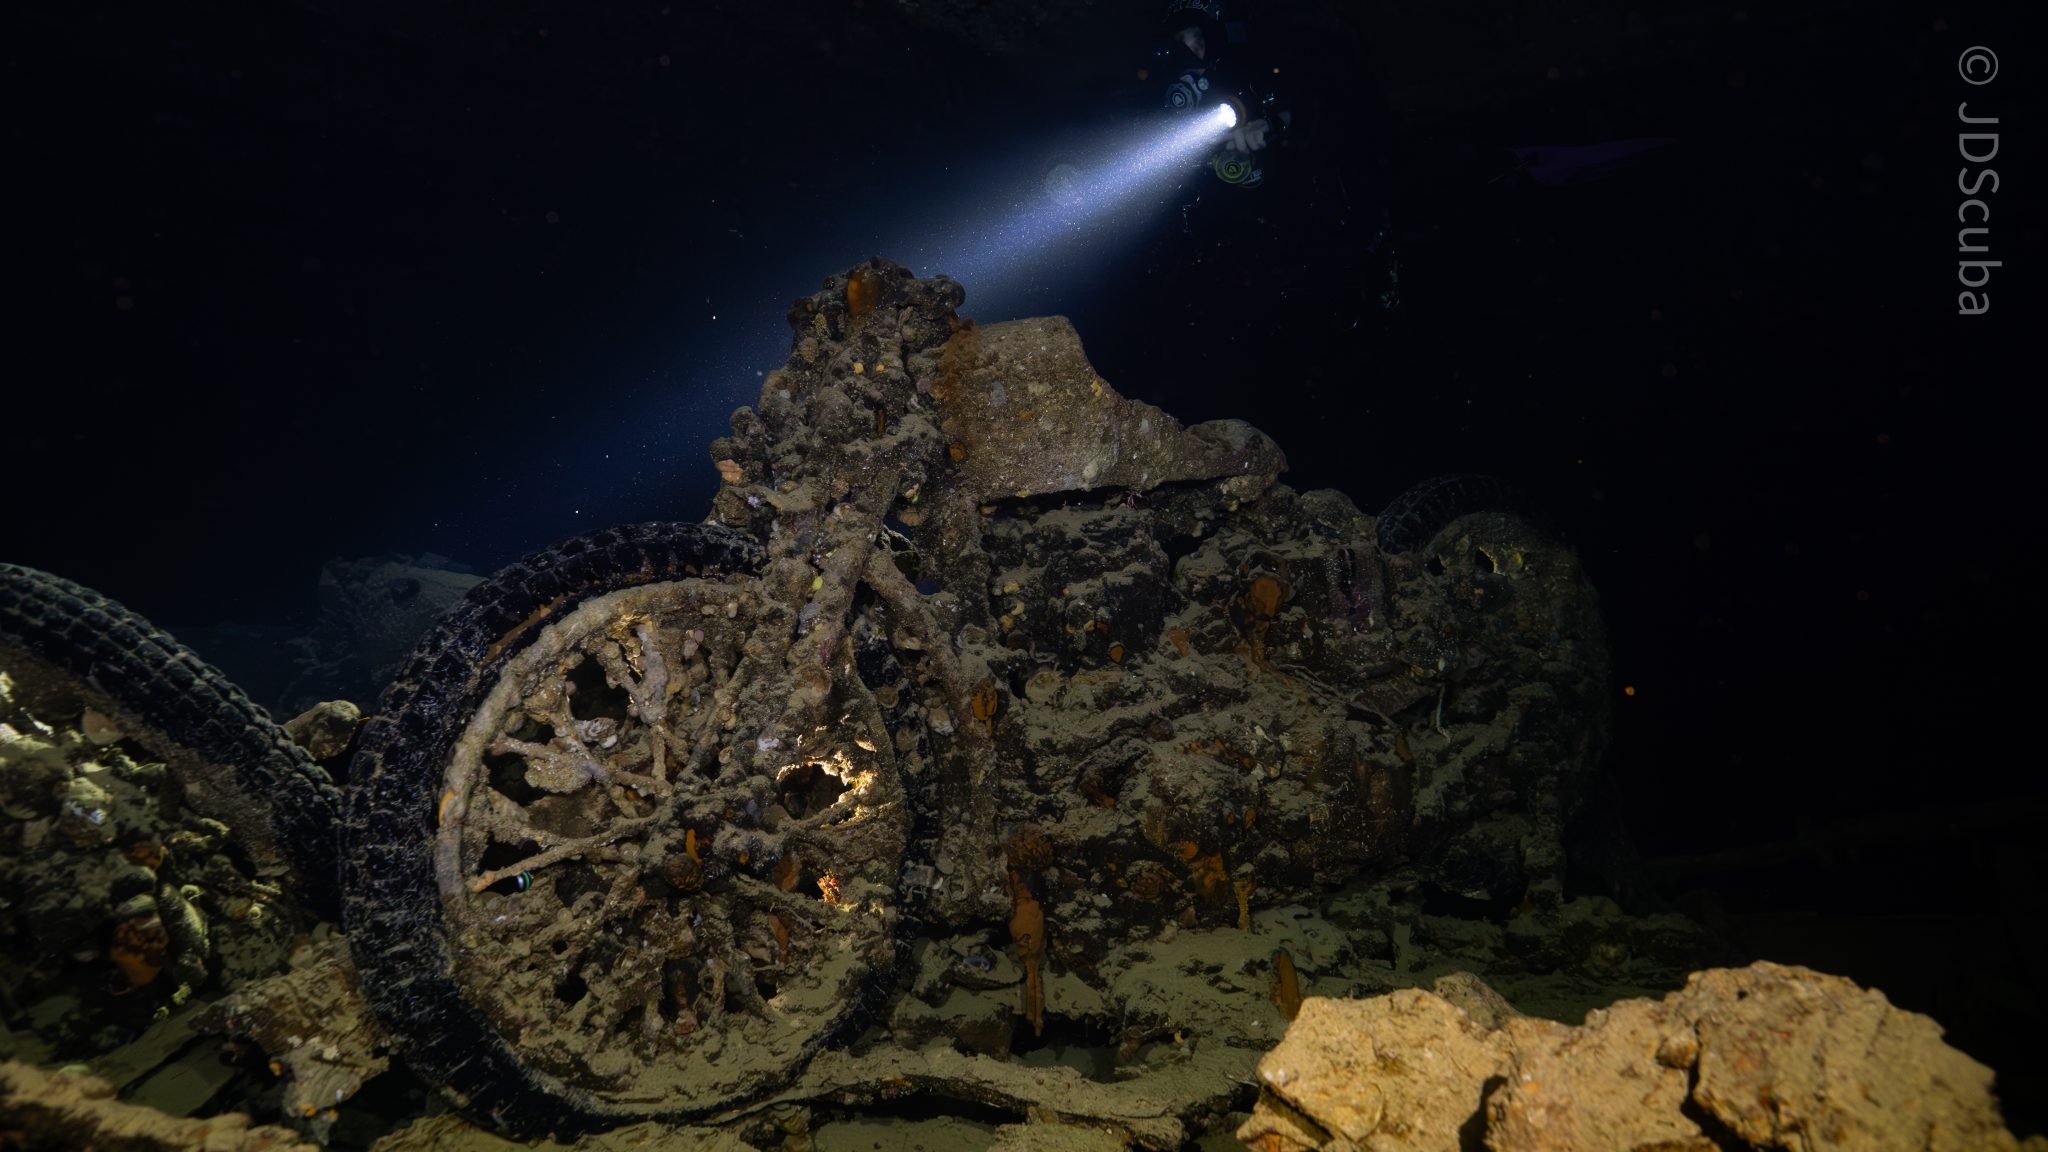
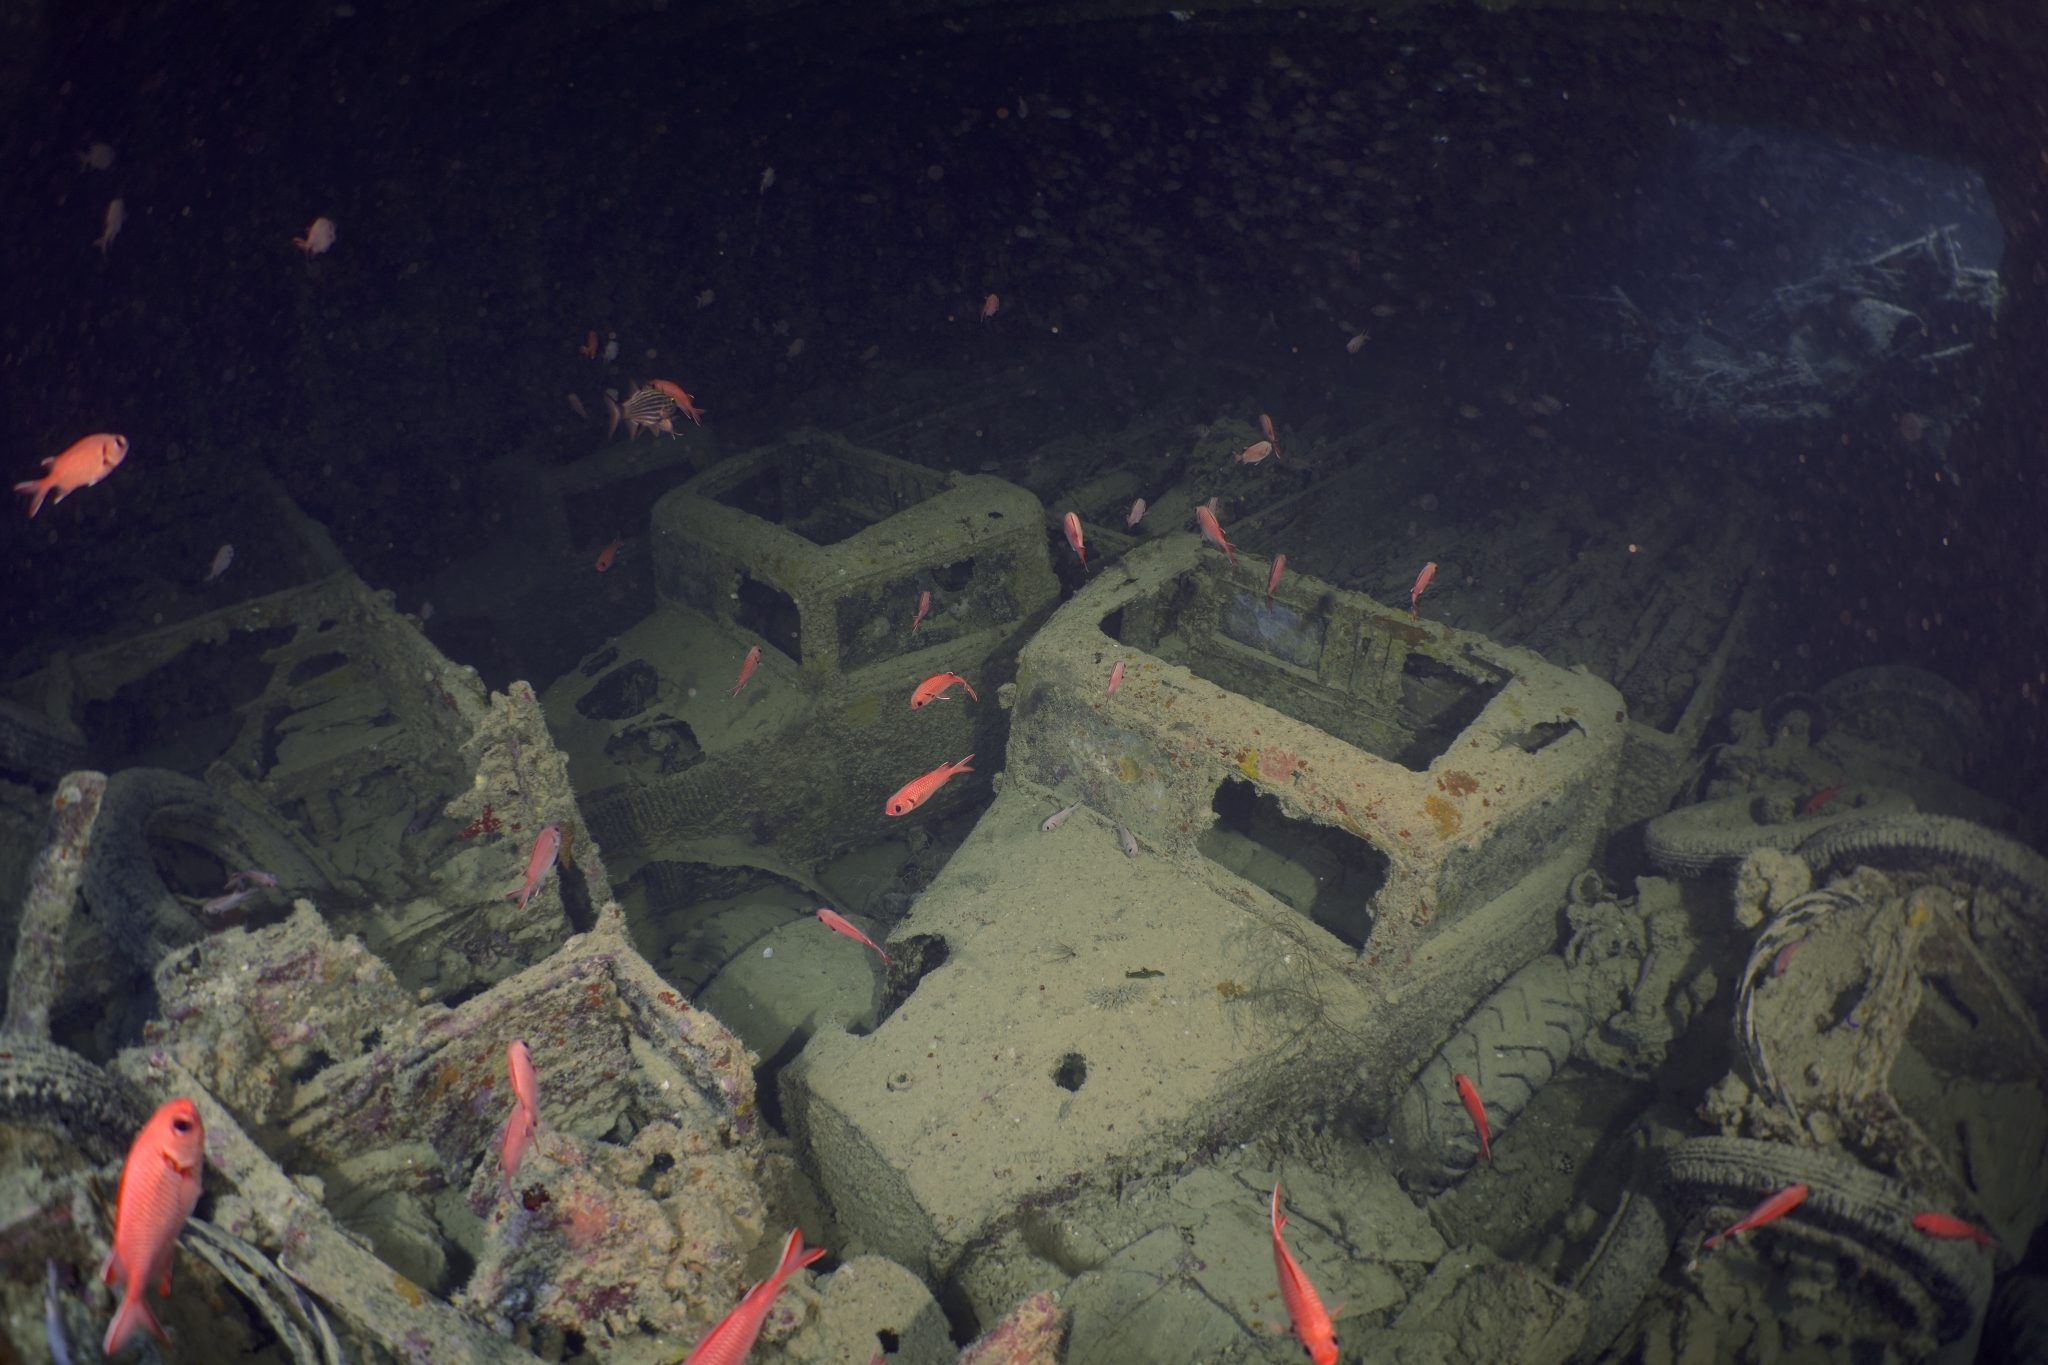
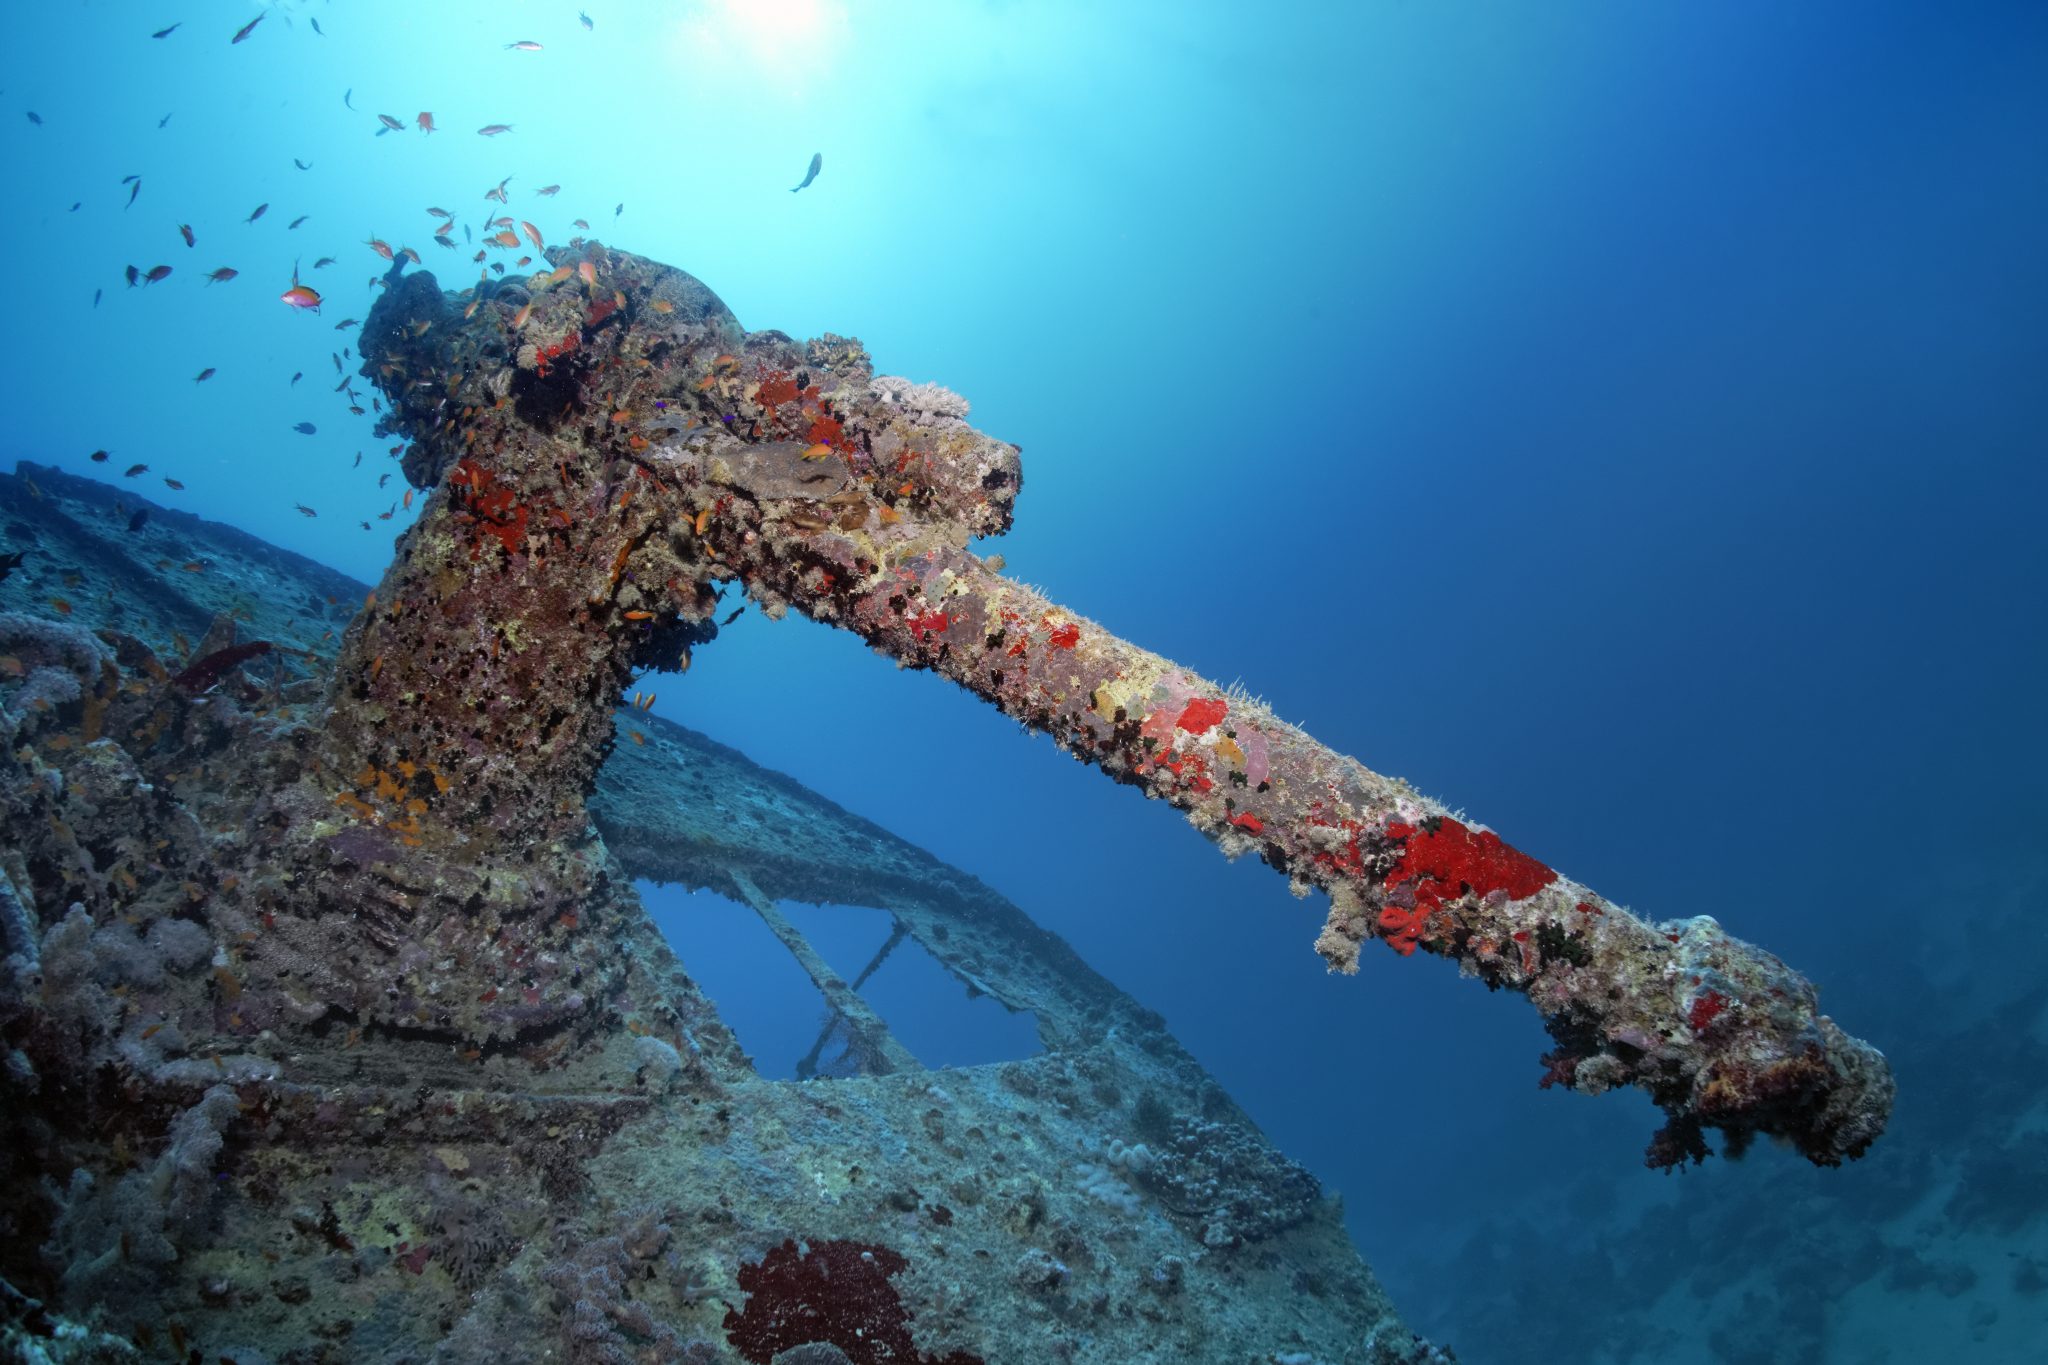
Kitting up, there was a lot of excitement on deck before entering the water and heading down the shoreline. Descending to the wreck, there was a light northerly current which reduced the visibility, making it feel more like the conditions that can be found off the Welsh coast. At 10m from the bottom, the outline of the wreck appeared as we reached the area of the wreck which had been bombed, as our mooring line was attached to part of the propeller shaft. Arriving on deck, instantly everywhere you looked there were many of the supplies which the ship was carrying, including Bren Carrier tanks and projectiles that instantly stood out.
We headed around the exterior, taking a look at the large propeller and guns mounted on deck before entering the wreck on the port side to take a look in the holds. It was incredible to see all the trucks, Norton 16H, and BSA motorcycles still perfectly stacked within, providing a real snapshot in time.

Overall, we had four dives on the Thistlegorm, where for all of the dives we were the only group in the water, and at times, there were just three of us on the whole wreck, which made it even more special, especially knowing that most days the wreck has hundreds of divers. Along with the history of the wreck, there was plenty of marine life on the wreck and around, from big green turtles to batfish, along with shoals of mackerel being hunted by trevally. Some unforgettable dives.
The final leg of the trip saw us cross back over the Suez Canal to the Gobal Islands where we planned to stay the night and do three dives at the Dolphin House for the potential of sharing the dive with dolphins. The site, which included a channel that was teeming with reef fish, especially large numbers of goatfish that swam in large shoals along the edge of the reef. These were nice relaxing dives to end the week. Unfortunately, the dolphins didn’t show up, which was okay as like all marine life they are difficult to predict and you can’t guarantee what’s going to be seen. With the last dive complete, we headed back to port for the final night where it was time to clean all the kit and pack before the departure flight the next day.
The whole week from start to finish on Ghazala Explorer was amazing; the boat had all the facilities you need for a comfortable week aboard. The crew were always there to help throughout the day and the chefs providing top quality food which was required after every dive. The itinerary providing some of the best diving with a nice mixture of wreck and reef dives. I would recommend the trip to anyone, whether it’s your first Red Sea liveaboard in the Red Sea or you’re revisiting. Hopefully, it’s not too long before I head back to explore more of the Red Sea onboard Ghazala Explorer.
To find out more about the Northern Red Sea reef and wrecks itineraries aboard Ghazala Explorer, or to book, contact Scuba Travel now:
Email: dive@scubatravel.com
Tel: +44 (0)1483 411590
Photos: Jake Davies / Avalon.Red


-

 News3 months ago
Hone your underwater photography skills with Alphamarine Photography at Red Sea Diving Safari in March
-
 News3 months ago
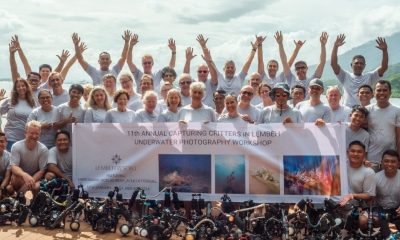
Capturing Critters in Lembeh Underwater Photography Workshop 2024: Event Roundup
-

 Marine Life & Conservation Blogs2 months ago
Creature Feature: Swell Sharks
-

 Blogs2 months ago
Murex Resorts: Passport to Paradise!
-

 Blogs2 months ago
Diver Discovering Whale Skeletons Beneath Ice Judged World’s Best Underwater Photograph
-

 Marine Life & Conservation2 months ago
Save the Manatee Club launches brand new webcams at Silver Springs State Park, Florida
-
 Gear Reviews3 months ago
Gear Review: Oceanic+ Dive Housing for iPhone
-
 Gear Reviews2 weeks ago
GEAR REVIEW – Revolutionising Diving Comfort: The Sharkskin T2 Chillproof Suit