
Blogs
Northern Red Sea Reefs and Wrecks Trip Report, Part 2: Wall to Wall Wrecks
Jake Davies boards Ghazala Explorer for an unforgettable Red Sea diving experience…
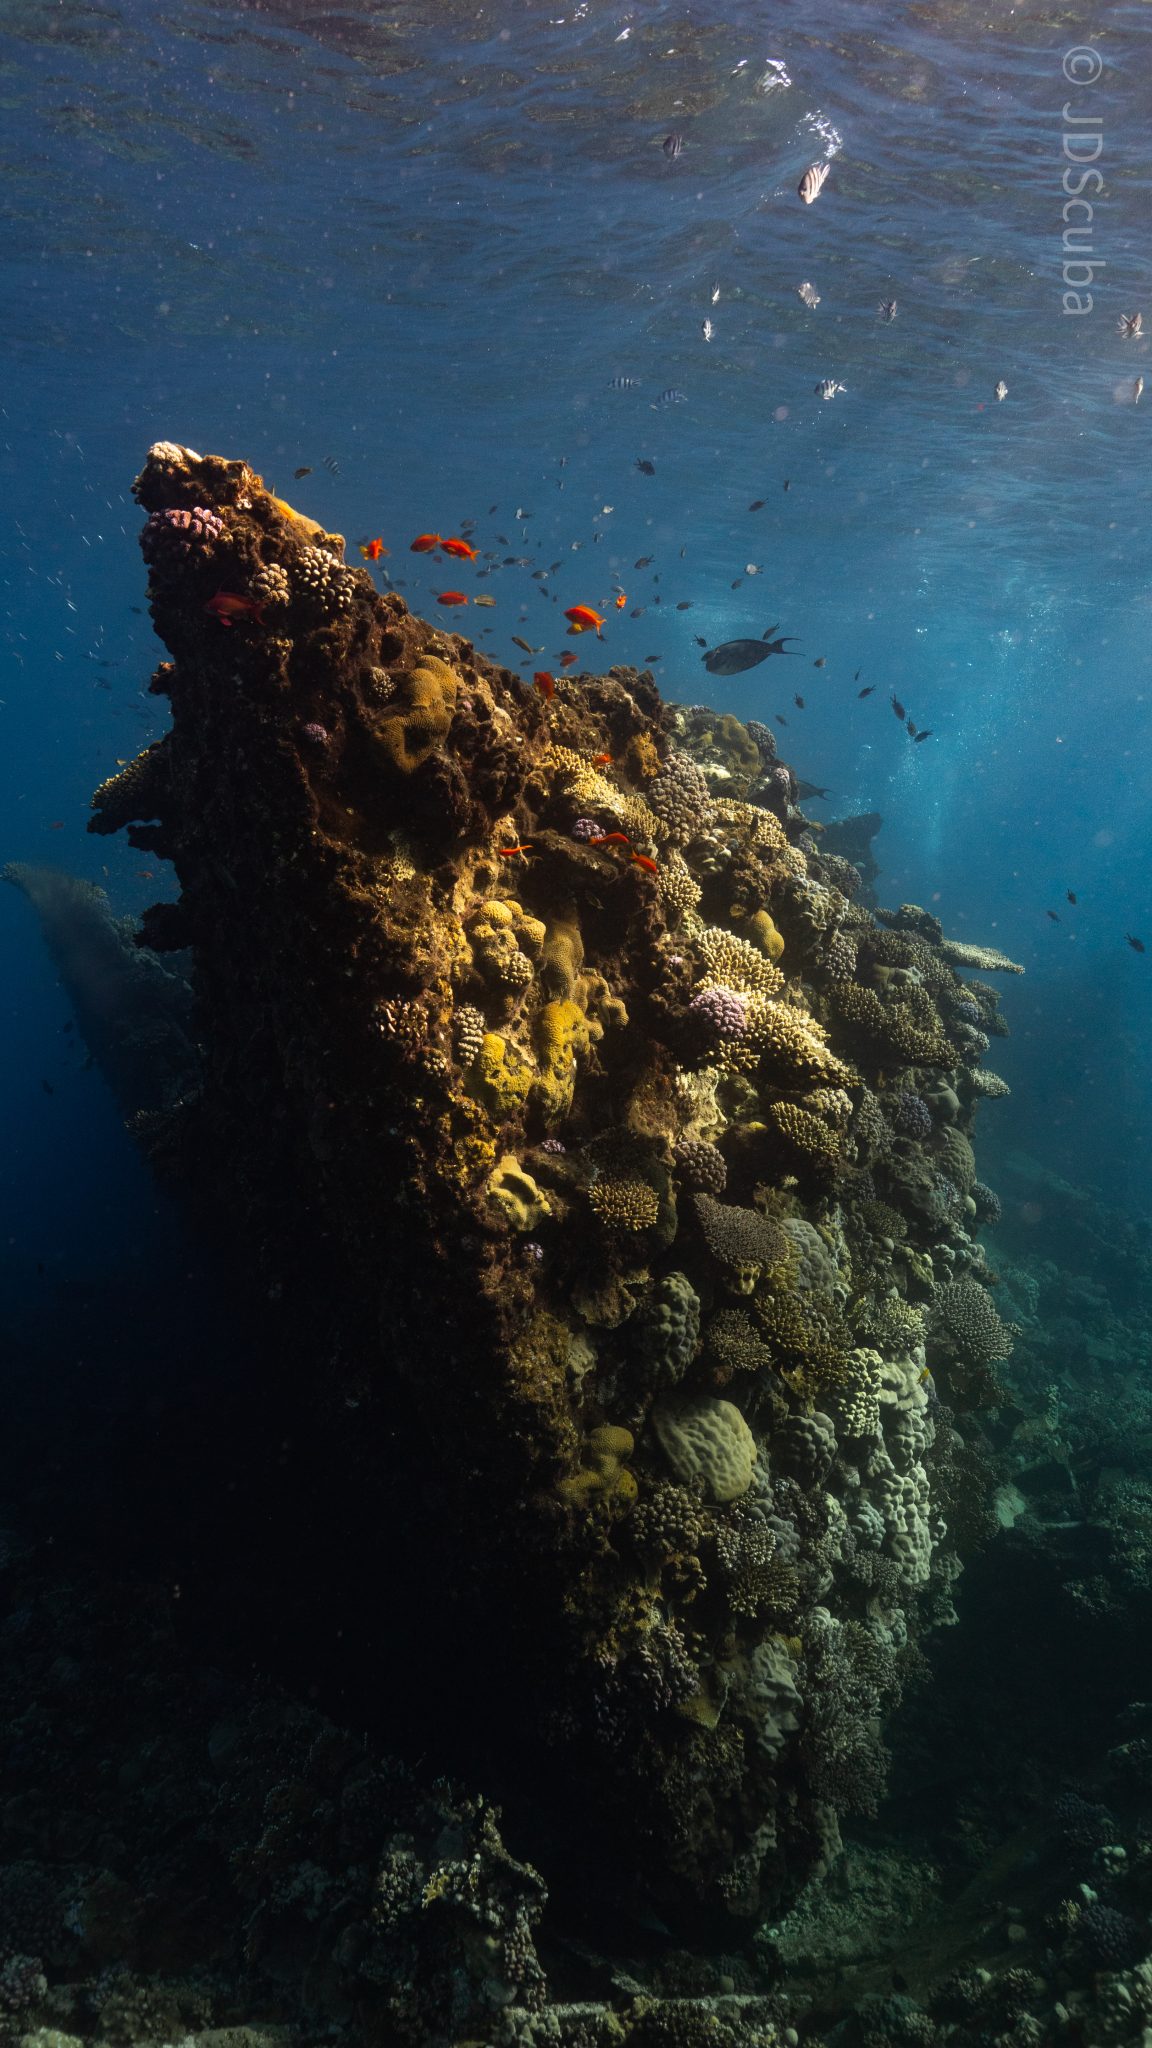
The second day’s diving was a day full of wreck diving at Abu Nuhas, which included the Chrisoula K, Carnatic, and Ghiannis D. The first dive of the day was onto the Chrisoula K, also known as the wreck of tiles. The 98m vessel remains largely intact where she was loaded with tiles which can be seen throughout the hold. The stern sits at 26m and the bow just below the surface. One of the highlights of the wreck is heading inside and seeing the workroom where the machinery used for cutting the tiles are perfectly intact. The bow provided some relaxing scenery as the bright sunlight highlighted the colours of the soft coral reef and the many reef fish.
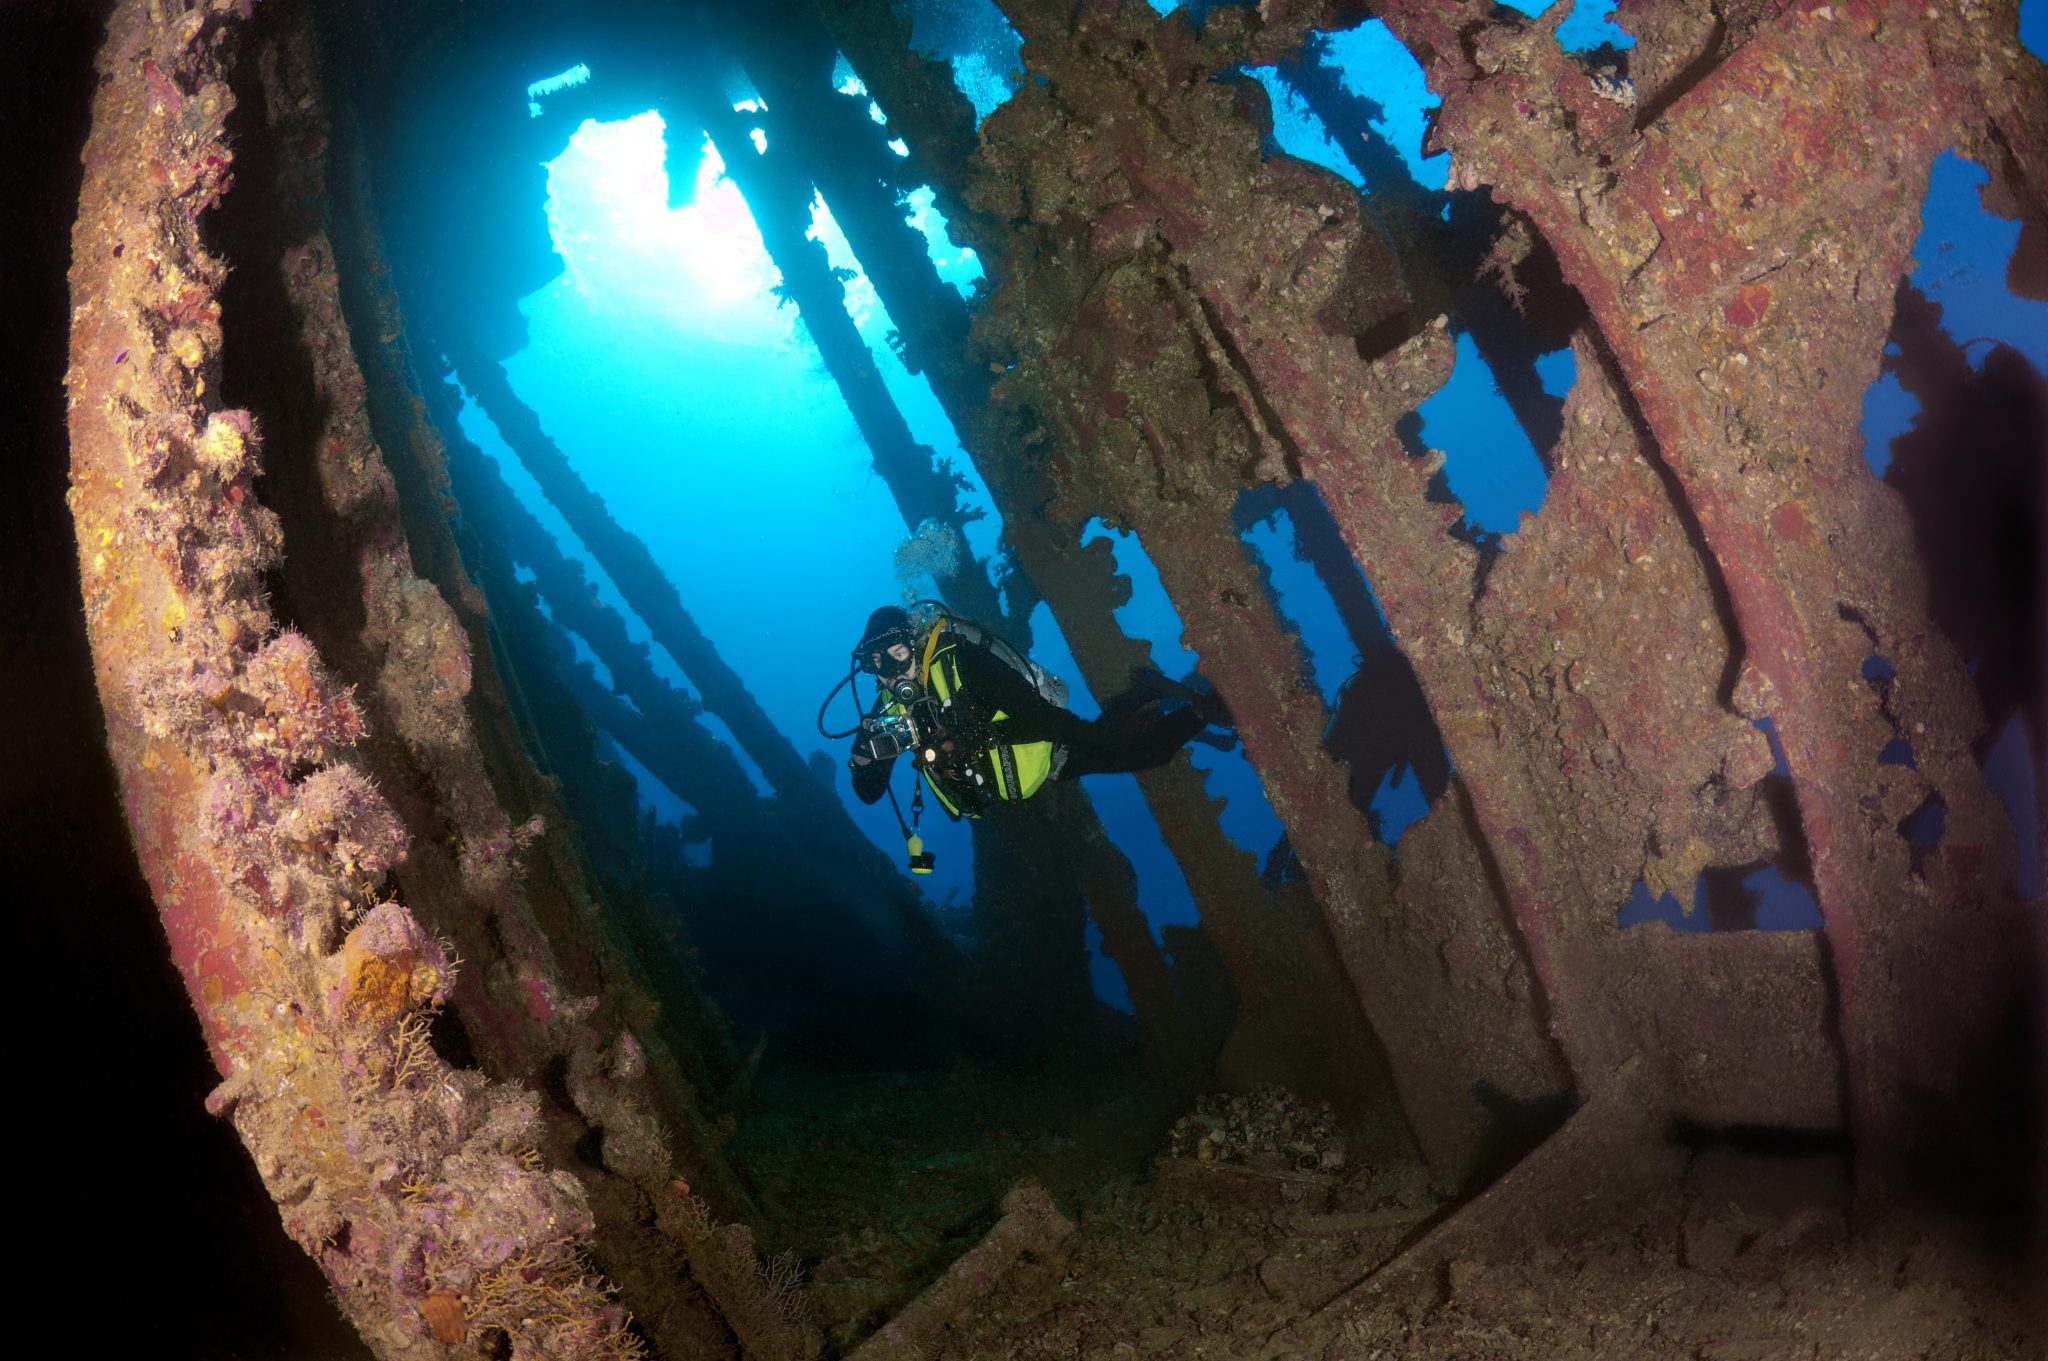
Following breakfast, we then headed to the next wreck, which was the Carnatic. The Carnatic is an 89.9m sail steamer vessel that was built in Britain back in 1862. She ran aground on the reef back in 1869 and remains at 27m. At the time, she was carrying a range of items, including 40,000 sterling in gold. An impressive wreck where much of the superstructure remains, and the two large masts lay on the seafloor. The wooden ribs of the hull provide structures for lots of soft corals, and into the stern section, the light beams through, bouncing off the large shoals of glass fish that can be found using the structure as shelter from the larger predators that are found outside of the wreck.
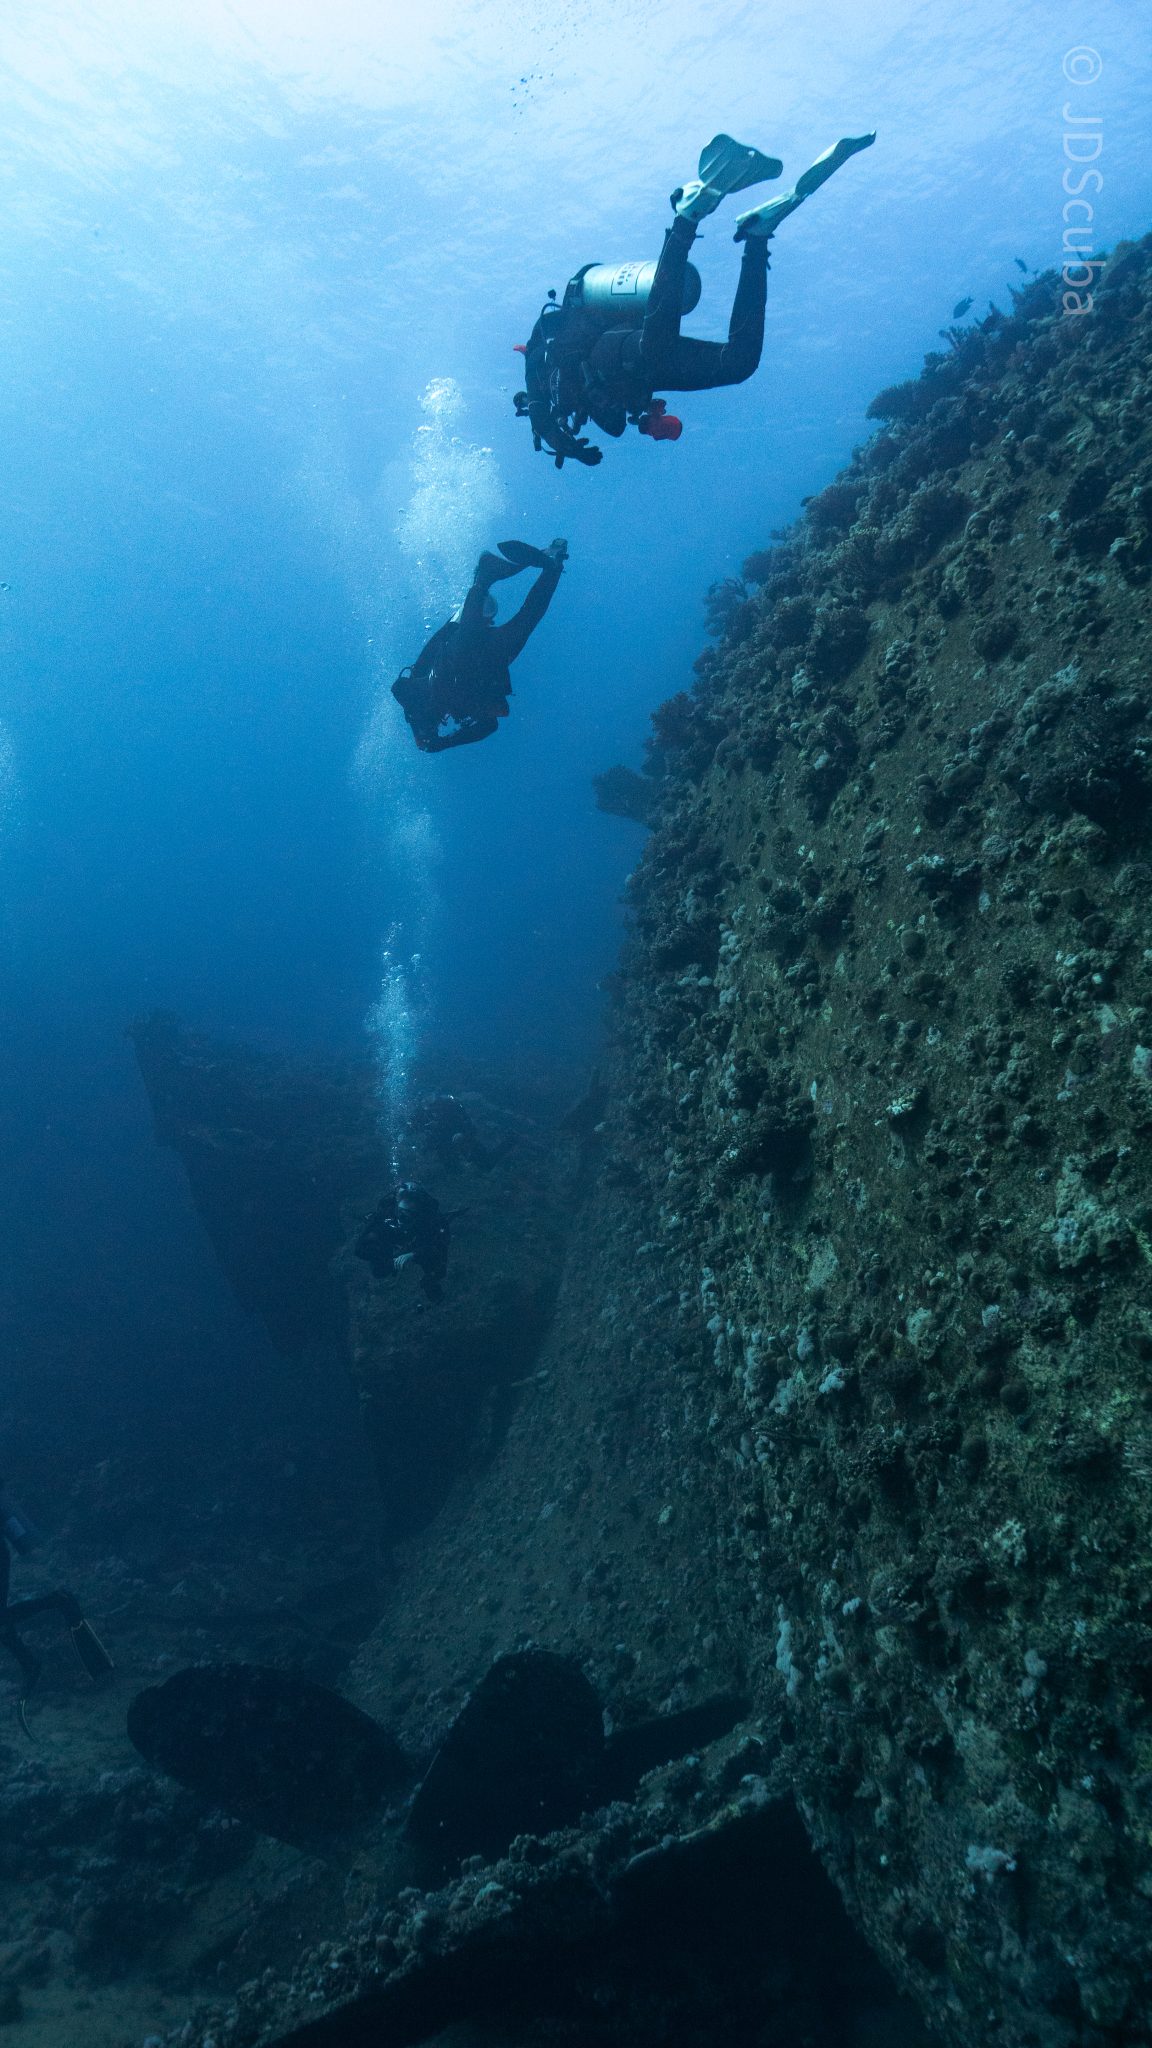
The final wreck at Abu Nuhas was the Ghiannis D, originally called ‘Shoyo Maru,’ which was 99.5m long and built in Japan back in 1969 before becoming a Greek-registered cargo ship in 1980. The ship then ran aground on the reef on April 19th, 1983, and now sits at the bottom at a depth of 27m. Heading down the line, the stern of the ship remains in good condition compared to the rest of the hull. The highlight of the wreck, though, is heading into the stern section and down the flights of stairs to enter the engine room, which remains in good condition and is definitely worth exploring. After exploring the interior section of the ship, we then headed over to see the rest of the superstructure, where it’s particularly interesting to see the large table corals that have grown at the bow relatively quickly considering the date the ship sank. After surfacing and enjoying some afternoon snacks, we made sure everything was strapped down and secured as we would be heading north and crossing the Gulf of Suez, where the winds were still creating plenty of chop.

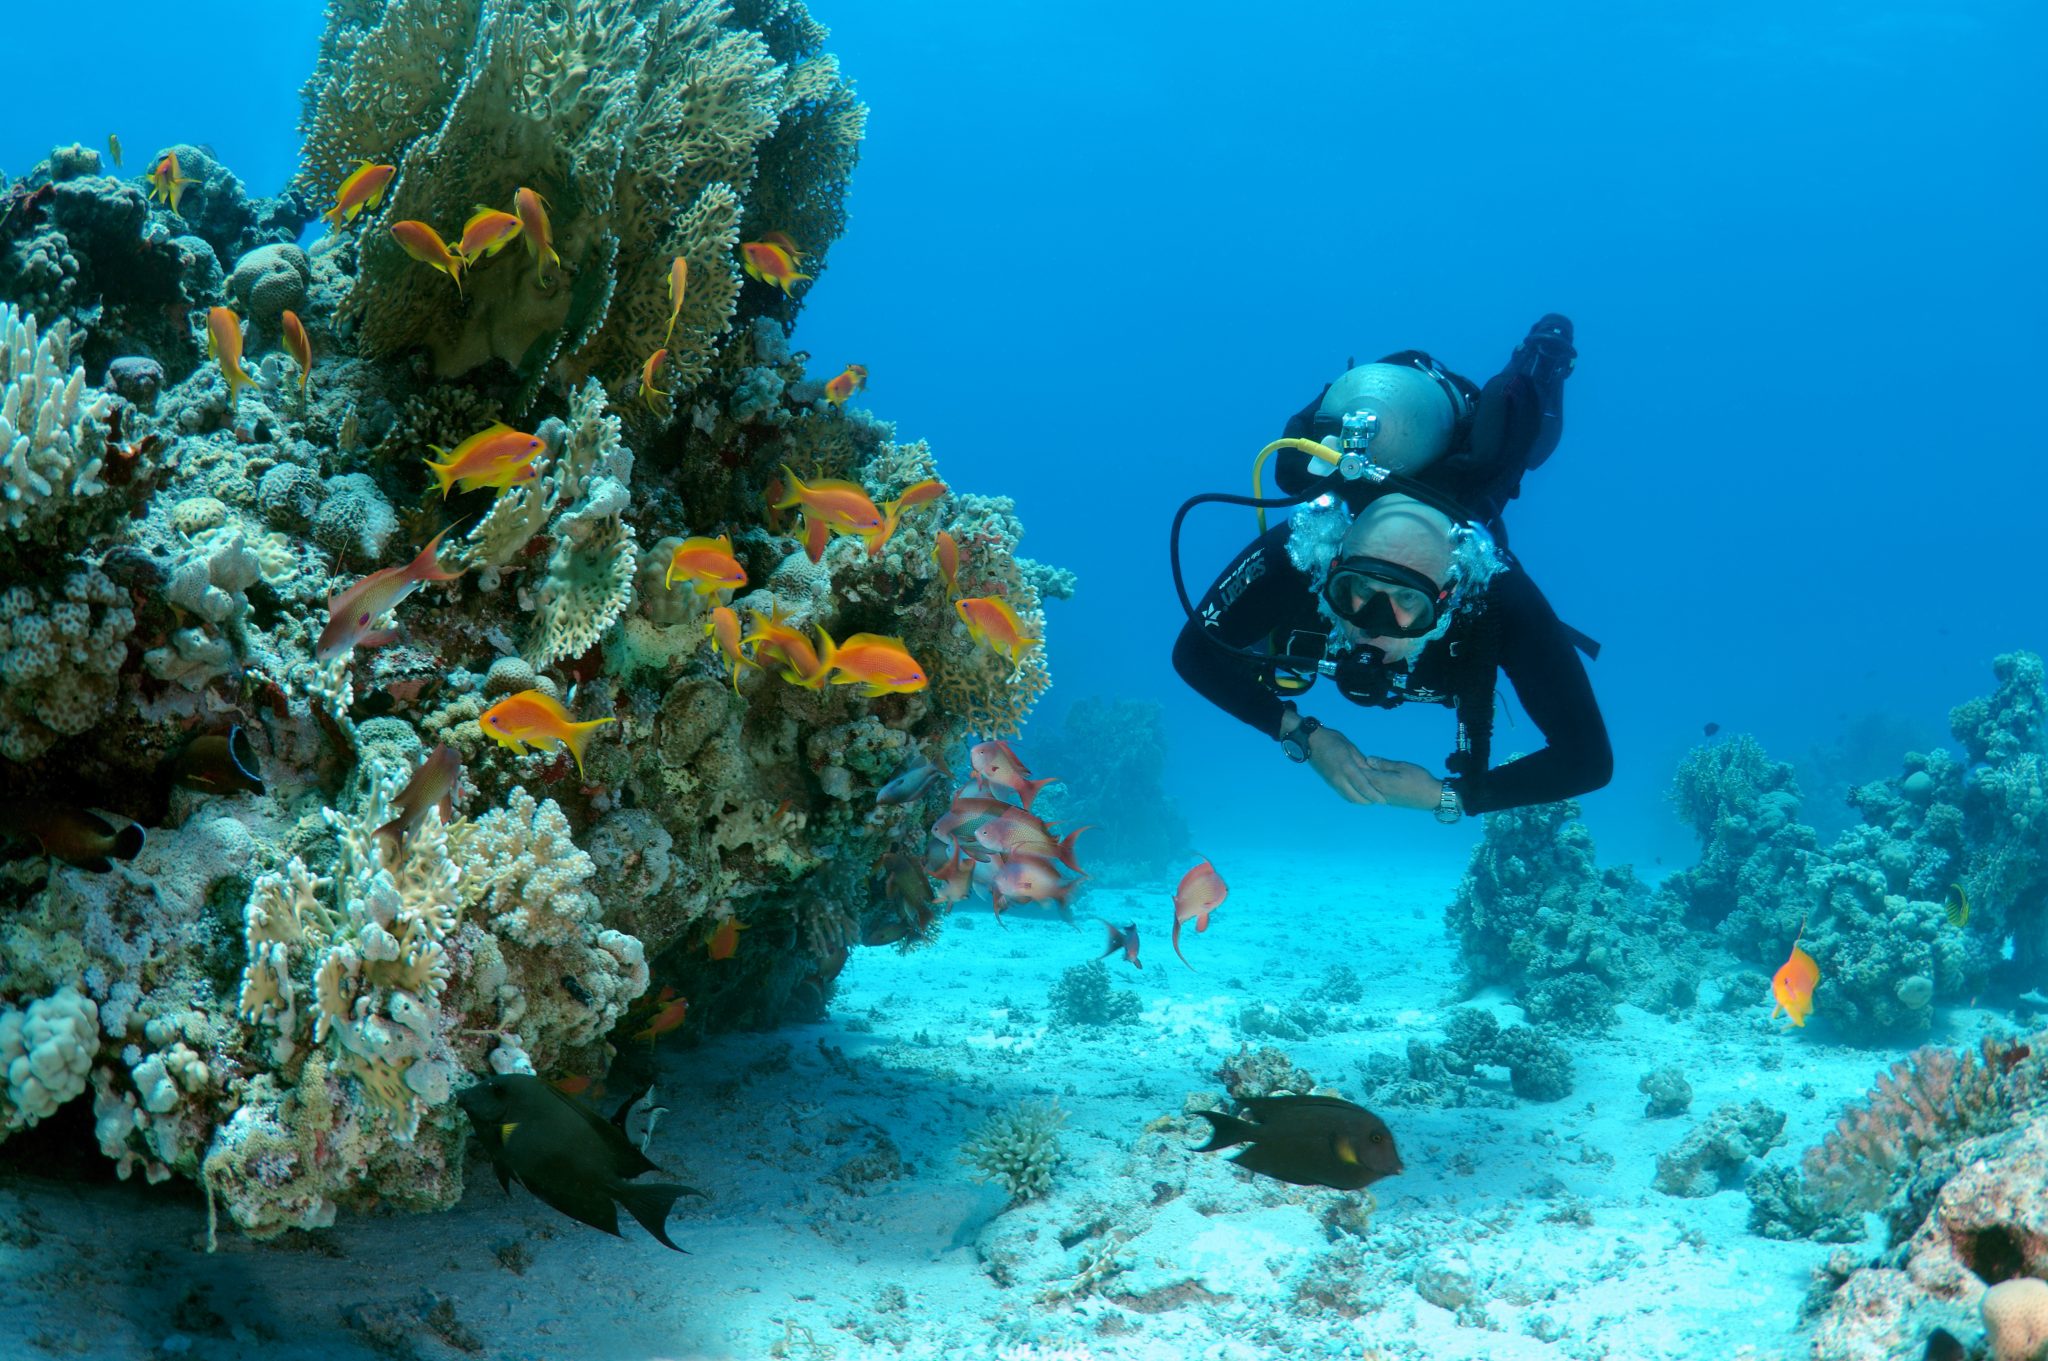
The next morning, it was a short hop to Ras Mohammed Nature Reserve for the next couple of days of diving. The 6am wake-up call came along with the briefing for the first site we would be diving, which was Shark & Yolanda. The low current conditions allowed us to start the dive at Anemone City, where we would drift along the steep, coral-filled wall. These dives involved drifts, as mooring in Ras Mohammed wasn’t allowed to protect the reefs. As a dive site, Shark & Yolanda is well-known and historically had a lot of sharks, but unfortunately not so many in recent years, especially not so early in the season. However, there was always a chance when looking out into the blue.
The gentle drift took us along the steep walls of the site, with plenty of anemone fish to be seen and a huge variety of corals. It wasn’t long into the dive before we were accompanied by a hawksbill turtle, who drifted with us between the two atolls before parting ways. Between the two reefs, the shallow patch with parts of coral heads surrounded by sand provided the chance to see a few blue-spotted stingrays that were mainly resting underneath the corals and are always a pleasure to see. With this being the morning dive, the early sunlight lit up the walls, providing tranquil moments. Looking out into the blue, there was very little to be seen, but a small shoal of batfish shimmering underneath the sunlight was a moment to capture as we watched them swim by as they watched us.

Towards the end of the dive, we stopped at the wreck of the Jolanda where the seafloor was scattered with toilets from the containers it was carrying. This provided a unique site to make a safety stop, which was also accompanied by a large barracuda slowly swimming by, along with a hawksbill turtle calmly swimming over the reef as the sun rays danced in the distance.
For the next dive, we headed north to the Strait of Tiran to explore the reefs situated between Tiran Island and Sharm El Sheik, which were named after the British divers who had found them. We started on Jackson before heading to Gordons Reef, where we also did the night dive. All the atolls at these sites provided stunning, bustling coral reefs close to the surface and steep walls to swim along, which always provided the opportunity to keep an eye out for some of the larger species that can be seen in the blue. Midwater around Jackson Reef was filled with red-toothed triggerfish and shoals of banner fish, which at times were so dense that you couldn’t see into the blue. Moments went by peacefully as we enjoyed the slow drift above the reef, watching these shoals swim around under the mid-afternoon sun.
The night dive at Gordon’s Reef was mainly among the stacks of corals surrounded by sand, which was great to explore under the darkness. After some time circling the corals, we came across what we were really hoping to find, and that was an octopus hunting on the reef. We spent the majority of the dive just watching it crawl among the reef, blending into its changing surroundings through changes in colour and skin texture. It’s always so fascinating and captivating to watch these incredibly intelligent animals, in awe of their ability to carry out these physical changes to perfectly blend into the reef. Before we knew it, it was time to head back to the boat to enjoy a well-deserved tasty dinner prepared by the talented chefs onboard.
Check in for the 3rd and final part of this series from Jake tomorrow!
To find out more about the Northern Red Sea reef and wrecks itineraries aboard Ghazala Explorer, or to book, contact Scuba Travel now:
Email: dive@scubatravel.com
Tel: +44 (0)1483 411590
Photos: Jake Davies / Avalon.Red


In June we were incredibly fortunate to be invited to dive in Alonissos, a small Greek Island in the Sporades island chain located in the North Aegean Sea. While I have long been a big fan of the Greek Islands as a great holiday destination, I had not had the opportunity to do any diving on previous visits and Mike and I were extremely excited to see what Alonissos had to offer both above and below the surface!

The Sporades are easily accessible via the airport in Skiathos (the first island in the chain), which is served by Jet2 flights from all major UK airports from May through October. Numerous ferries and charter boats make island hopping from Skiathos Town a breeze. After an hour boat ride, the picturesque port of Patitiri was a wonderful introduction to Alonissos, where we were met by our gracious hosts Kostas of Albedo Travel and Dias of Alonissos Triton Dive Center. Mike and I were delighted to be staying at the Paradise Hotel, aptly named for its stunning views over the sea and great location for walking to the waterfront.

Alonissos is beautifully situated in the National Marine Park of Alonissos and the Northern Sporades, the largest marine protected area in Europe. The surrounding seas offer fabulous marine life, including incredibly rare species such as the Mediterranean monk seal. They boast deep walls covered in gorgonians and sponges, stunning topography with caverns, swimthroughs and pinnacles, and the first accessible ancient shipwreck from 500BC!

In locations where historical sites have been reported, the waters are largely restricted, but with collaboration between government, underwater archeologists and dive centres, incredible underwater museums are being created for a truly unique diving experience. Alonissos is home to the first of these, the Ancient Shipwreck of Peristera Accessible Underwater Archeological Site. The chance to dive into history (along with reports of healthy reef life and amazing underwater topography) meant Mike and I were keen to get in the water.

Our introduction to the diving around Alonissos was at the Agios Georgios Pinnacles, in the channel between Alonissos and Skopelos. This fantastic site was named “The Chimney,’ and proved to have a huge amount to see. We got to a decent depth here (over 25m), and marvelled at a colourful reef wall with a wonderful swim through whose rocky walls were absolutely covered with life. As well as brilliant topography there was no shortage of macro life here. We saw numerous nudibranchs, five different species in total. The second dive at Mourtias reef nearby was a shallower dive along a nice wall with lots of crevices. Several moray eels and grouper called this site home. We enjoyed looking in the crevices for lobster and smaller benthic life, such as cup corals and tunicates.

Our itinerary allowed us two dives a day with afternoons left to explore the island with our hire car and evenings to enjoy the famous Greek hospitality. This proved to be a lovely mix of in-water and land based diversions.

The next days diving to the Gorgonian Gardens and Triton’s Cave was to be even better! These two stunning sites are nothing short of fabulous. The Gorgonian Gardens was a deep wall near to the Agios Georgios islands. The ever-present currents in this deep channel meant that the sea life was amazing … the namesake Gorgonian sea fans dotted the wall at a depth of 30 to 50 meters, getting ever larger the deeper we went. Above 30m was by no means less beautiful, with sponges, corals, scorpionfish, moray eels and some rare and colourful nudibranchs.

The second shallower dive of the day was to Triton’s Cave or the Cavern of Skopelos, on the east side of that island. The spectacular rock formations had wild striations both above and below the water making a truly epic topography. The cavern entrance was at 14m, and big enough for a buddy pair, winding up to 6m and passing two beautiful windows out into the blue. Emerging from the cavern, the light at the shallower depths and the incredible rock formations made for a fantastic gentle swimming safety stop and we all surfaced by the boat with massive grins.

Check out our next blog :Alonissos: The complete diving destination (Part 2)” to hear about our amazing dive on the 2500 year old Peristera Wreck!
Thanks to:
Alonissos Triton Dive Center https://bestdivingingreece.com/
Albedo Travel https://alonissosholidays.com/activities/
Paradise Hotel https://paradise-hotel.gr/
Alonissos Municipality https://alonissos.gr/en/

Our second days dive itinerary was to the famous Christoforos wreck! This is arguably the best dive in Skopelos and though only open to divers with deep diving experience, this 83m long wreck is well worth the visit.
The Christoforos sits in 43 meters of water with the deck at 32 to 35 meters. A 30m dive can give an impressive view of the wreck, though such a large wreck needs a few dives to truly do it justice. Given its ideal location just a 2 minute boat ride from the dive centre dock it is an excellent first dive of the day. The sheltered site is also diveable in all but the absolute worst weather so although deep, the water is usually clear with little to no current making it a very pleasant dive. The site is superb for technical diving and a great training site for the Tec 40 and 45 programs, offered by Skopelos Dive Center.

The Christoforos wreck was originally a collier ship built in 1950 at Grangemouth shipyard under the name “Thomas Hardie”. In 1976 she joined the Greek merchant fleet as “Christoforos”. On the 2nd of October 1983 the Christoforos was carrying 2600 tonnes of cement from Volos to Piraeus Port. During the voyage the weather turned, resulting in the ship developing a 7 degree list, whereby she changed course for safe anchorage at Panormos, Skopelos. The ship reached Panormos at 16:00 with a list of 17 degrees and water ingress to No. 1 hull. Though attempts were made to right the vessel, the crew were ordered to abandon ship at 22:00. The captain, lieutenant and the quartermaster remained to try and save the ship, but had to abandon the attempt themselves and the Christoforos finally sank at 05:30 on 3rd October 1983. She now sits upright in 43 meters of water less than 200m from shore in Panormos.

Diving has only been allowed here since 2018, so the wreck is very well preserved and a real treat to dive. Permission to dive here was granted by the authorities after lots of incredibly hard work by the Skopelos Dive Center staff. Having a fantastic wreck in such an amazing location and in excellent condition is a real privilege.

Of all the sites in Skopelos this was the site Mike and I were most keen to experience. Having kitted up and zipped across the bay to the mooring, we left the surface and followed the descent line until the wreck emerged spectacularly from the blue at 15m. She is a big and beautiful wreck, sitting as though calmly continuing her journey along the seabed. With most of her original features still intact there were points of interest everywhere, including the anchors, winches, ships telegraphs, the wheel and RDF antenna.

We found that aquatic life had colonised the ship, with schools of fish, electric blue nudibranchs, a large moray eel and the resident scorpionfish lurking inside the bridge. The Christoforos was truly a stunning wreck and despite maximising our time at depth we eventually had to say our goodbyes and begin the slow and steady return to the surface.

After a superb morning dive we had the afternoon to do a little sightseeing of the island, with a trip to the church of Agios Ioannis Kastri made famous by the blockbuster movie “Mamma Mia!”. Mike and I spent a happy afternoon pootling around in our little hire car before meeting up with Lina from Skopelos Dive Center. An underwater archeologist as well as a dive professional, Lina had offered to show us a rather special attraction, the Christoforos shipwreck Digital Spot public information and awareness centre.

A fantastic initiative made possible from the collaboration of the government and hard work of the staff at Skopelos Dive Center is the “Digital Spot” in Agnontas port. This information center has a number of displays on the history of the Christoforos wreck, the process by which the wreck was allowed to be opened to the public for diving tourism, other sites of historical interest in the area, a video of the wreck and the best bit, a virtual reality dry dive experience! The beauty of the VR system is that non diving members of the family can see what you have seen on the wreck, or you can see areas that you may not have explored during the dive due to time or depth limitations. It was a truly immersive experience and a great addition to the dive itself.

After a wonderful day we celebrated our last evening on the island with an exquisite meal in Skopelos Town with fabulous views over the town and bay, washed down with the excellent local wine. The lamb with lemon and potatoes was a meal which I could happily eat every day for the rest of my life!

Skopelos is an island that truly has it all. The diving is excellent, the landscape is beautiful with plenty of non diving activities, the locals friendly and the food and drink superb. Given how accessible it is as a holiday destination it has avoided becoming overcrowded and even in peak season offers a fun yet relaxing atmosphere. We highly recommend giving Skopelos a visit. We will certainly be back again!
Thanks to:
Municipality of Skopelos (https://skopelos.com/)
Skopelos Dive Center (https://sporadesdiving.gr/)
Ionia Hotel (https://www.ioniahotel.gr/en)
Dolphin of Skopelos (https://dolphinofskopelos.com/)
Ta Kymata restaurant (@takymata)
The Muses restaurant (https://www.facebook.com/TheMussesMousses/)
Aktaiov resturant (https://skopelos.com/listings/aktaion-taverna/)

-

 Blogs2 months ago
Diving With… Nico, Ocean Earth Travels, Indonesia
-

 News1 month ago
Murex Bangka Announce New Oceanfront Cottages & Beachfront Dining
-

 Blogs2 months ago
A new idea in freediving from RAID
-

 Marine Life & Conservation1 month ago
Iceland issue millionaire whale hunter a licence to murder 128 vulnerable fin whales
-

 Marine Life & Conservation2 months ago
The Shark Trust Great Shark Snapshot is back
-
 News3 months ago
Charting New Waters; NovoScuba Goes Global with the Launch of their Revolutionary Dive Training Agency!
-

 Gear News1 month ago
New Suunto Ocean – a dive computer and GPS sports watch in one for adventures below and above the surface
-

 Marine Life & Conservation Blogs2 months ago
Book Review: Plankton