
News
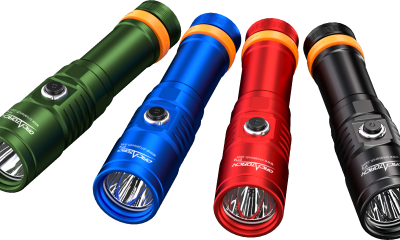
Breathtaking Colour with the Sea Dragon light range from SeaLife
Divers know that the underwater world is much more colourful than you could possibly imagine. To make sure that photos and videos show these brilliant colours the photographer and videographer must ensure optimal illumination. Especially suitable are the new Sea Dragon photo-video dive lights that light up the underwater world, exposing a blaze of colour.
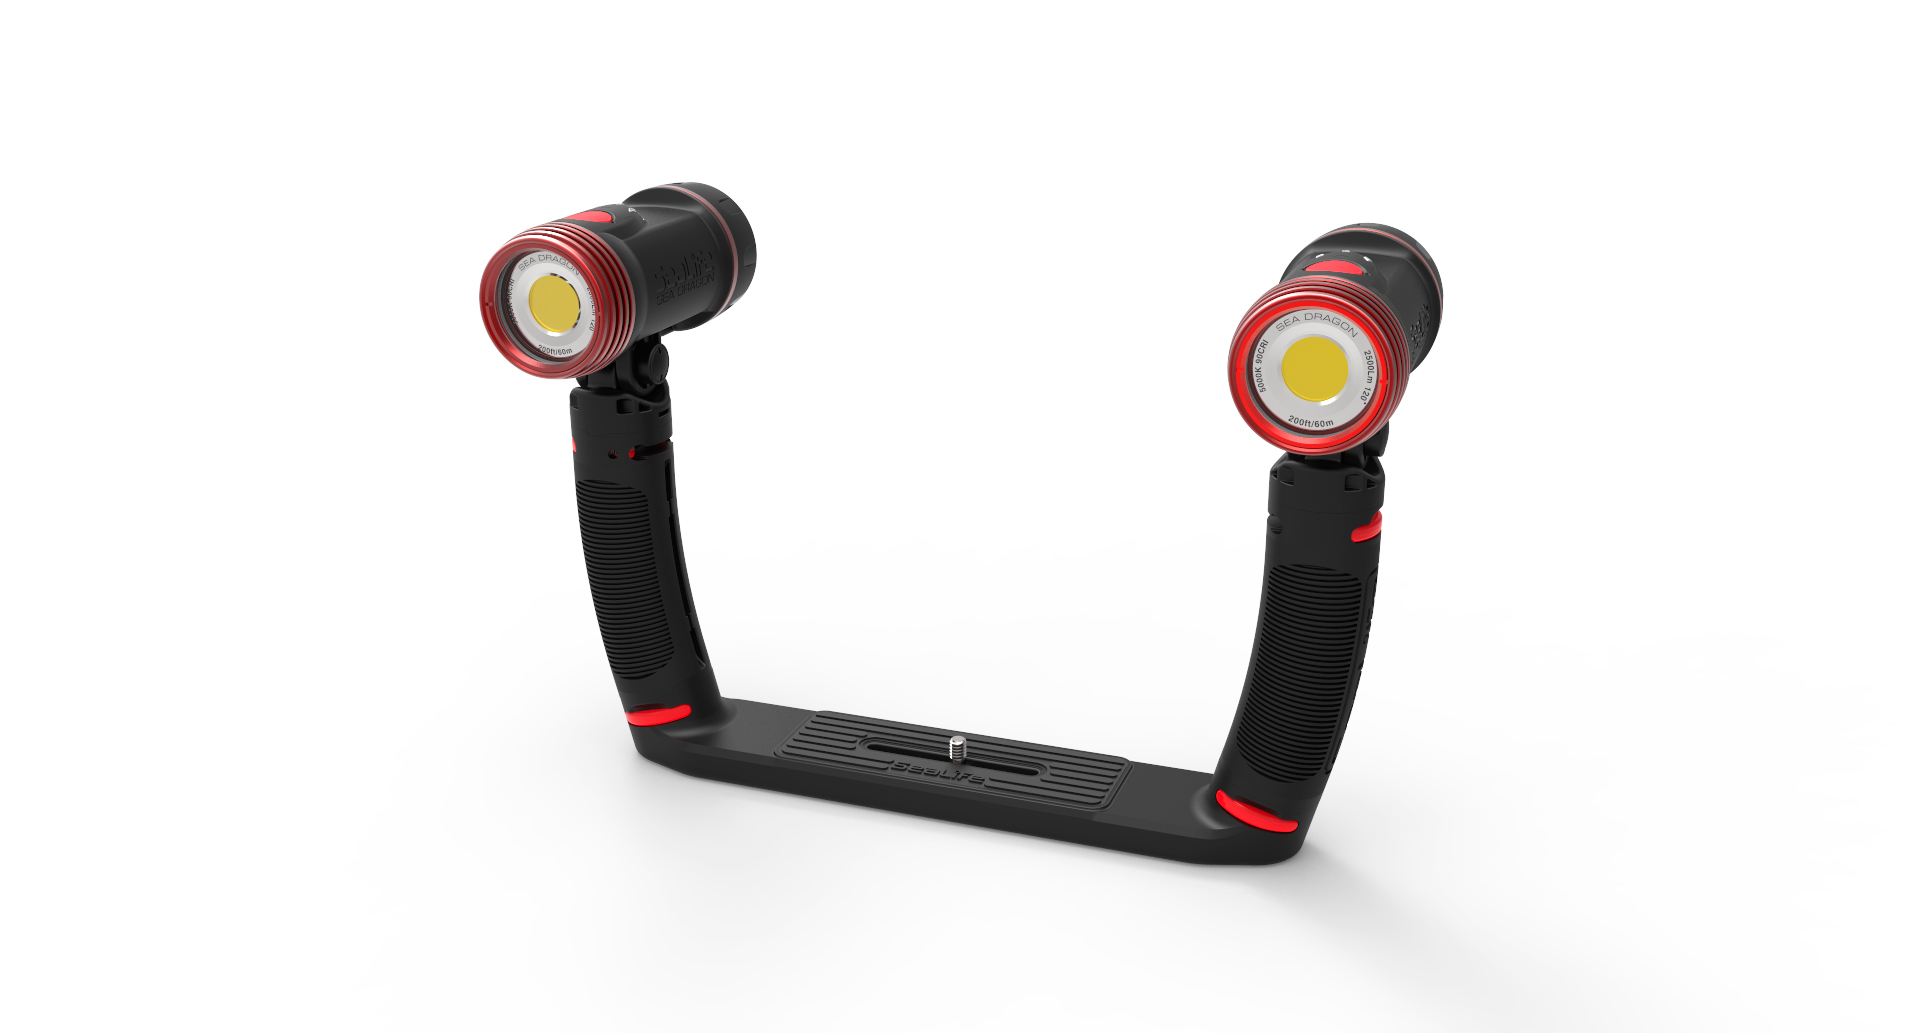
Here are the four new and exceptional Sea Dragon lights from SeaLife:
TRUE COLOURS WITH SEA DRAGON 2500F
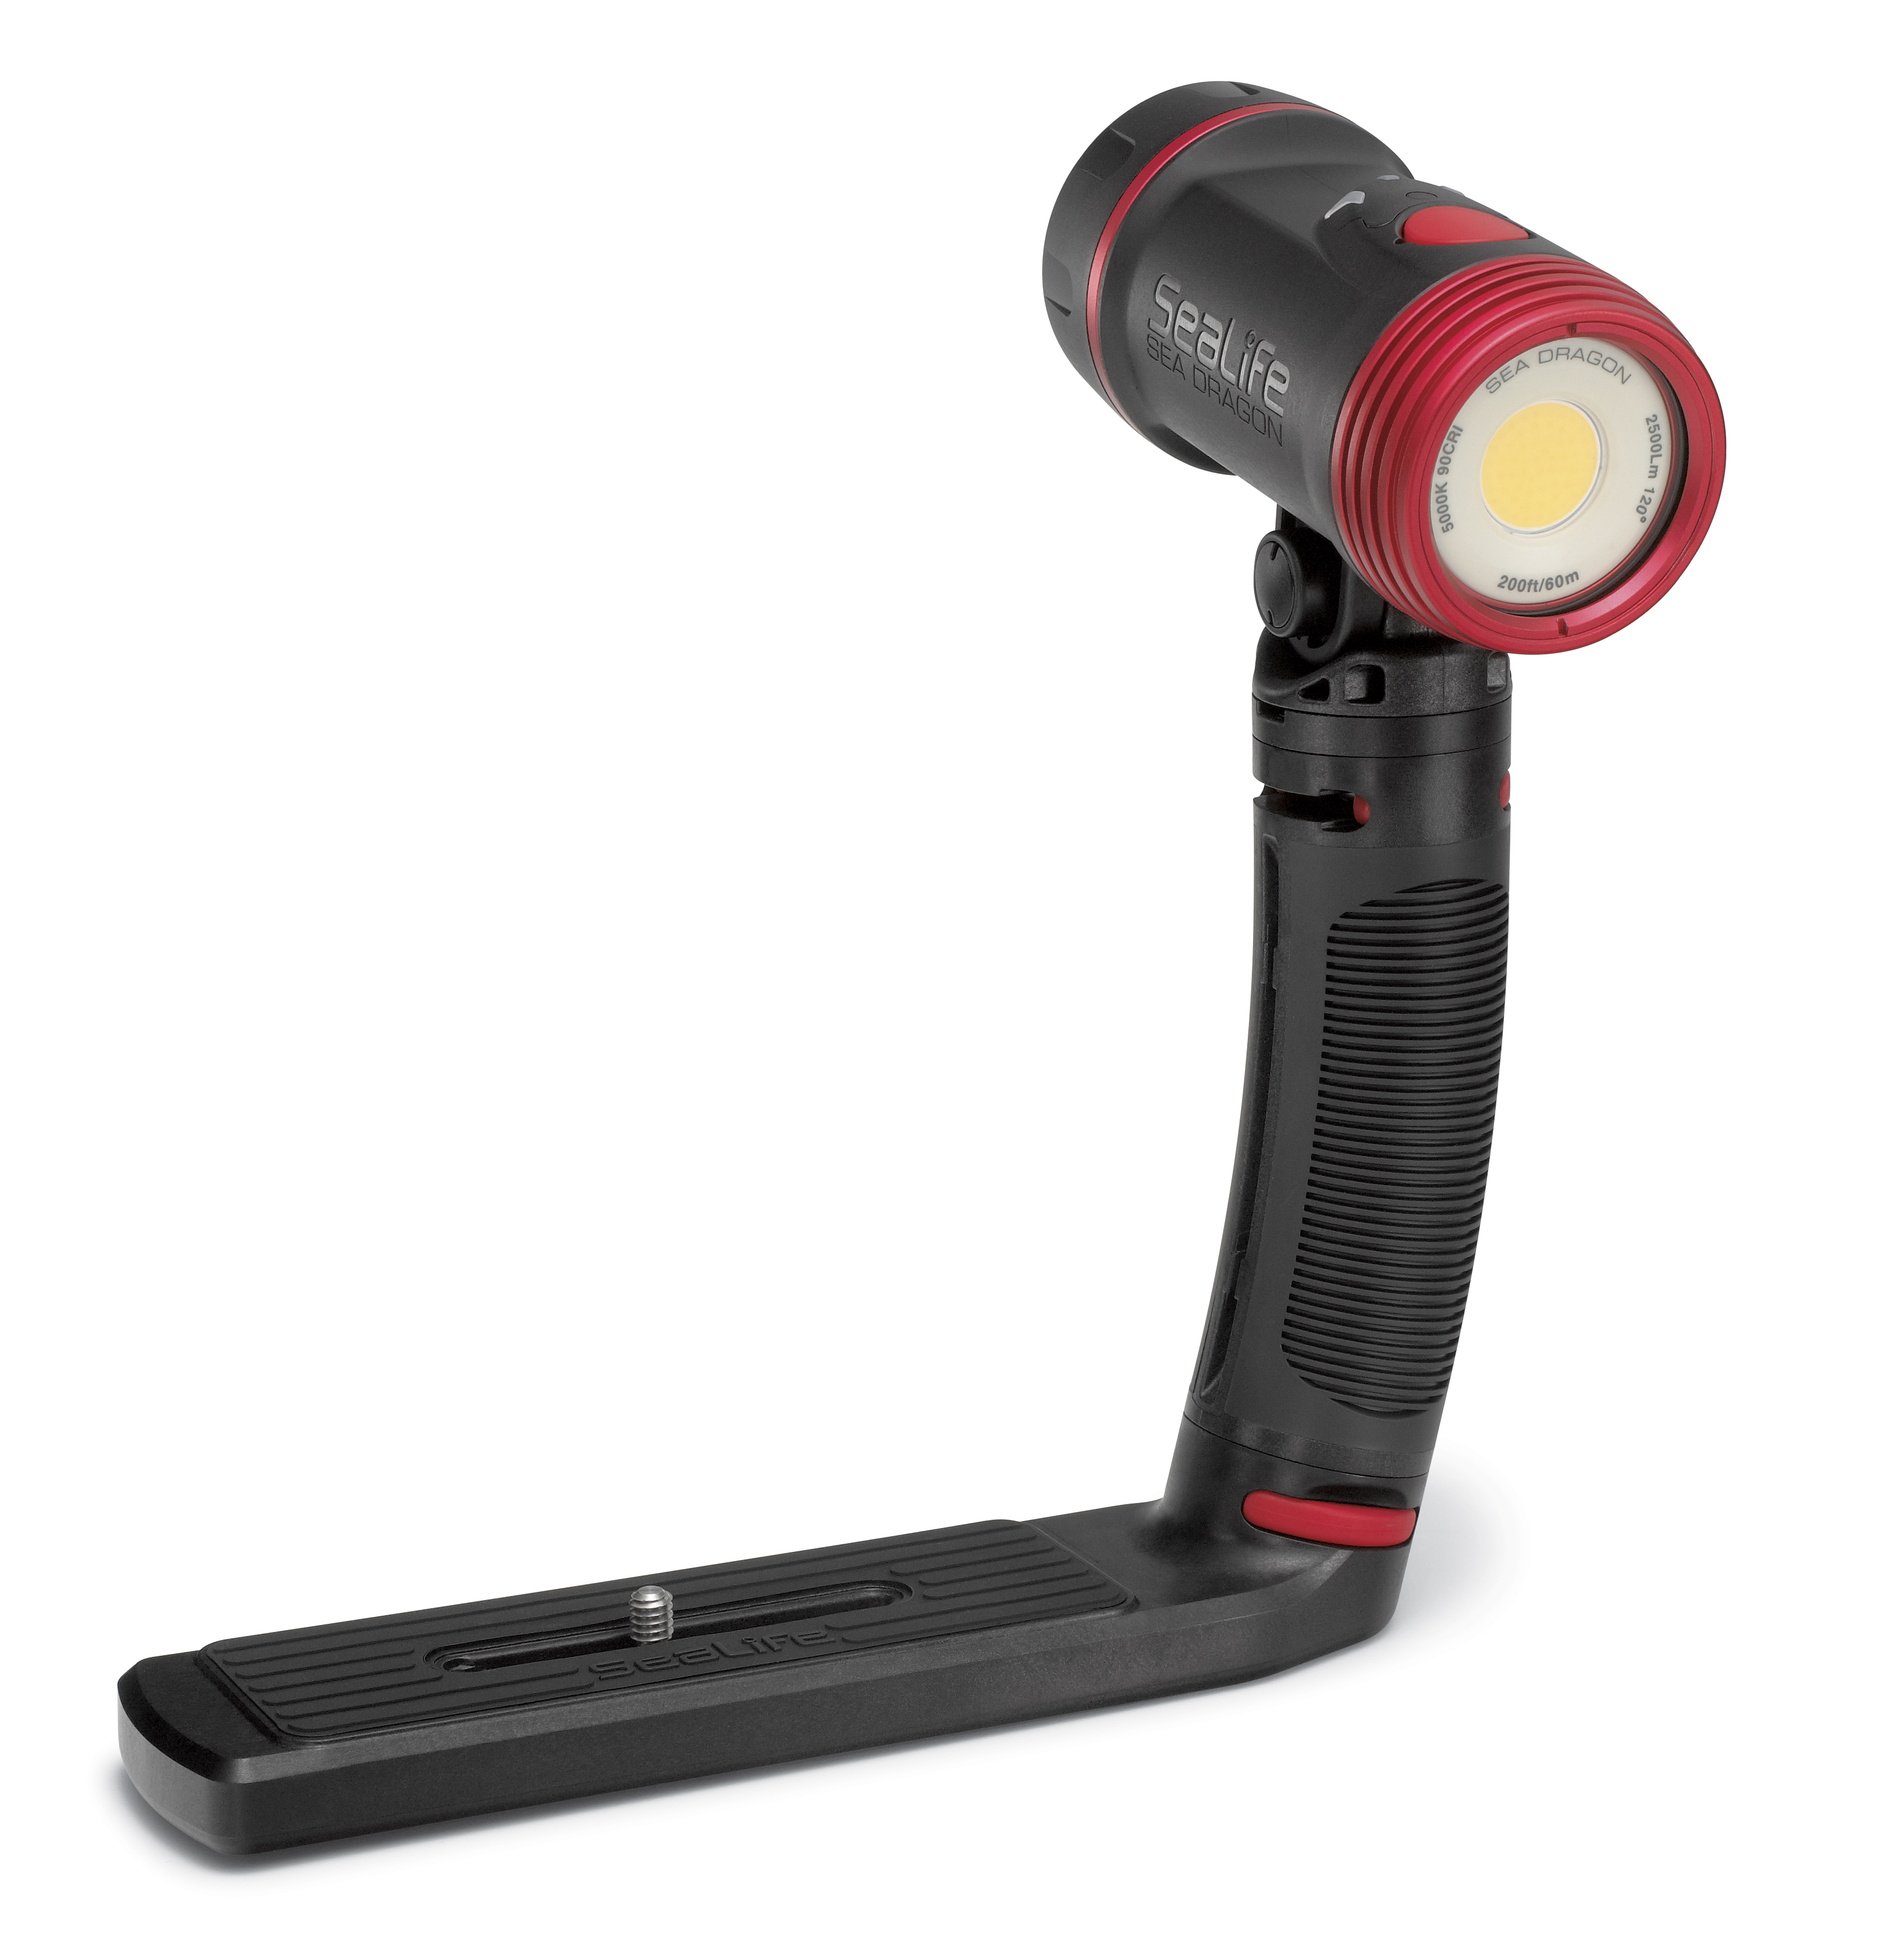 The newest Sea Dragon UW light delivers 2500 true colour lumens in a smooth, even 120° wide beam. This revolutionary COB LED array technology produces a 90 CRI (colour rendering index) that mimics natural daylight. Most other LED’s have 70 CRI, missing wavelengths of the visible light spectrum.
Technical Details
- Powerful 2500 lumen LED light. Latest COB LED array technology
- One button control for easy operation. One button to power light on/off and select brightness
- Three brightness levels 100%, 50% and 25%
- Hidden emergency signal mode. 1 sec blink interval and SOS Morse code. Push and hold power button for 4 seconds to activate
- 60 minute burn time at full power and constant brightness
- Easy to expand with Flex-Connect™ trays, grips, arms, cold-shoe, ball joint and Y-S adapters
- Quick-release button to detach light and aim in crevices and hard to reach areas
- 120° wide beam angle evenly illuminates the subject with no hot spots.
- Depth tested to 200ft (60m) – Guaranteed
- Corrosion-proof metal light head for heat dispersion and durability
- Removable 25W Li-Ion battery w/ charger and international plug adapters included
- Waterproof battery compartment – even if the O-ring seal fails, the battery compartment is isolated so water cannot reach the internal electronics
SWITCHABLE BEAMS FOR WIDE AREA FLOOD TO LONG RANGE SPOT WITH SEA DRAGON 2500SF
The new Sea Dragon Dual Beam combines power and versatility into one compact light. The 2100 lumen 100° wide beam is ideal for shooting still images and video, or viewing a wide area. Easy, one-button operation switches the beam from flood to an 800 lumen 15° spot for longer reach and pointing out sea life.
Technical Details
- Dual beam – Powerful 2100 lumen wide and 800 lumen spot. Featuring 7x CREE XM-L2 LEDs
- One button control for easy operation. Power on/off, adjust brightness and switch beam angle
- Four brightness levels – 100% Flood, 50% Flood, 25% Flood and 100% Spot
- Hidden emergency signal mode. 1 sec blink interval and SOS Morse code. Push and hold power button for 4 seconds to activate
- 60 minute burn time at full power and constant brightness
- Easy to expand with Flex-Connect™ trays, grips, flex arms, handle, Y-S, ball joint, cold shoe and other Flex-Connect adapters
- Quick-release button to detach light and aim in crevices and hard to reach areas
- 100° wide and 15° spot beam angles
- Depth tested to 200 ft (60m) – Guaranteed
- Corrosion-proof metal light head for heat dispersion and durability
- Removable 25W Li-Ion battery w/ charger and international plug adapters included
- Waterproof battery compartment – even if the O-ring seal fails, the battery compartment is isolated so water cannot reach the internal electronics
The 2500F and the 2100SF are compatible with every underwater camera when used with accessories from the Sealife Flex-Connect-System such as trays, the Flex-Arm, grips, handles and adapters.

SEA DRAGON 650S AND 650F
The compact and ergonomic 650 Spot is a UW light equipped with a long range beam. The 650 Flood has a 120° beam angle, offering the ideal illumination for photos and videos as well as a wide viewing angle during diving.
 Technical Details

- 650 lumens Using latest CREE XM-L2 LED
- Beam Angle 650F: 120° ultra-wide beam for photo-video or wide area viewing
- Beam Angle 650S: 15° spot beam for long range viewing and pointing out sealife
- One button operation: Long push (1 sec) to power on/off; Short push to cycle through 3 light modes: 100% full brightness → 50% half brightness → Emergency (blinks once every second at full power)
- Three light modes: Full power 650 lumen, half power 325 lumen, emergency signal
- Includes Y-S mount and 3 mounts for connecting light to GoPro, AquaPod or housing cold-shoe.
- Depth tested to 330ft (100m)
- Battery options: Two (2) CR123 lithium single-use batteries (included) -or- one (1) 18650 Li-Ion rechargeable battery (Sold separately)
- Constant current. Light maintains consistent brightness as battery voltage drops
- Coloured Battery indicator. Green = full, yellow = medium and red = low battery strength
- Safety pressure release valve relieves internal pressure built-up caused by damaged battery
- Burn Time: 60 minutes with CR123 batteries
100 minutes with Tenergy 18650 Li-ion battery (2600 mAh/3.7V) at full power
(120 and 200 minutes respectively at 50% power)
- Construction: Anodized aluminium head with rubber-armoured / polycarbonate body
- LED life span: 30,000 hours
- Colour temp: 6200 to 7000K
- Dimensions:6” diameter x 6.3” (41mm x 159mm)
- Weight: 7 ounces (189 grams) w/o battery
Sea Dragon Lights are available at authorised Subgear dealers.
Sea Dragon 2500F £439
Sea Dragon 2500 Duo Set £739
Sea Dragon 2100SF £439
Sea Dragon 650F and 650S £125
For more information, click here.


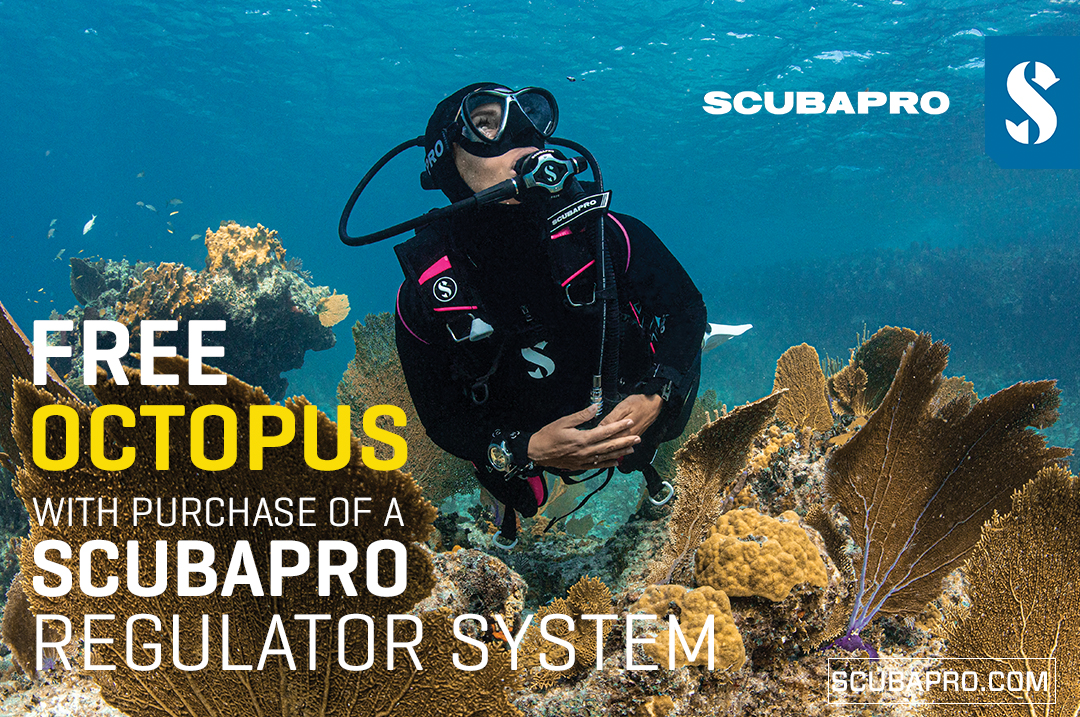
Free Octopus with every purchase of a SCUBAPRO regulator system
Just in time for the spring season, divers can save money with the FREE OCTOPUS SPRING PROMOTION! Until July 31st SCUBAPRO offers an Octopus for free
with every purchase of a regulator system!
Get a free S270 OCTOPUS with purchase of these combinations:
MK25 EVO or MK19 EVO with A700
MK25 EVO or MK19 EVO with S620Ti
MK25 EVO or MK19 EVO with D420
MK25 EVO Din mit S620Ti-X
Get a free R105 OCTOPUS with purchase of the following combinations:
MK25 EVO or MK19 EVO with G260
MK25 EVO or MK17 EVO with S600
SCUBAPRO offers a 30-year first owner warranty on all regulators, with a revision period of two years or 100 dives. All SCUBAPRO regulators are of course certified according to the new European test standard EN250-2014.
Available at participating SCUBAPRO dealers. Promotion may not be available in all regions. Find an authorized SCUBAPRO Dealer at scubapro.com.
More information available on www.scubapro.com.
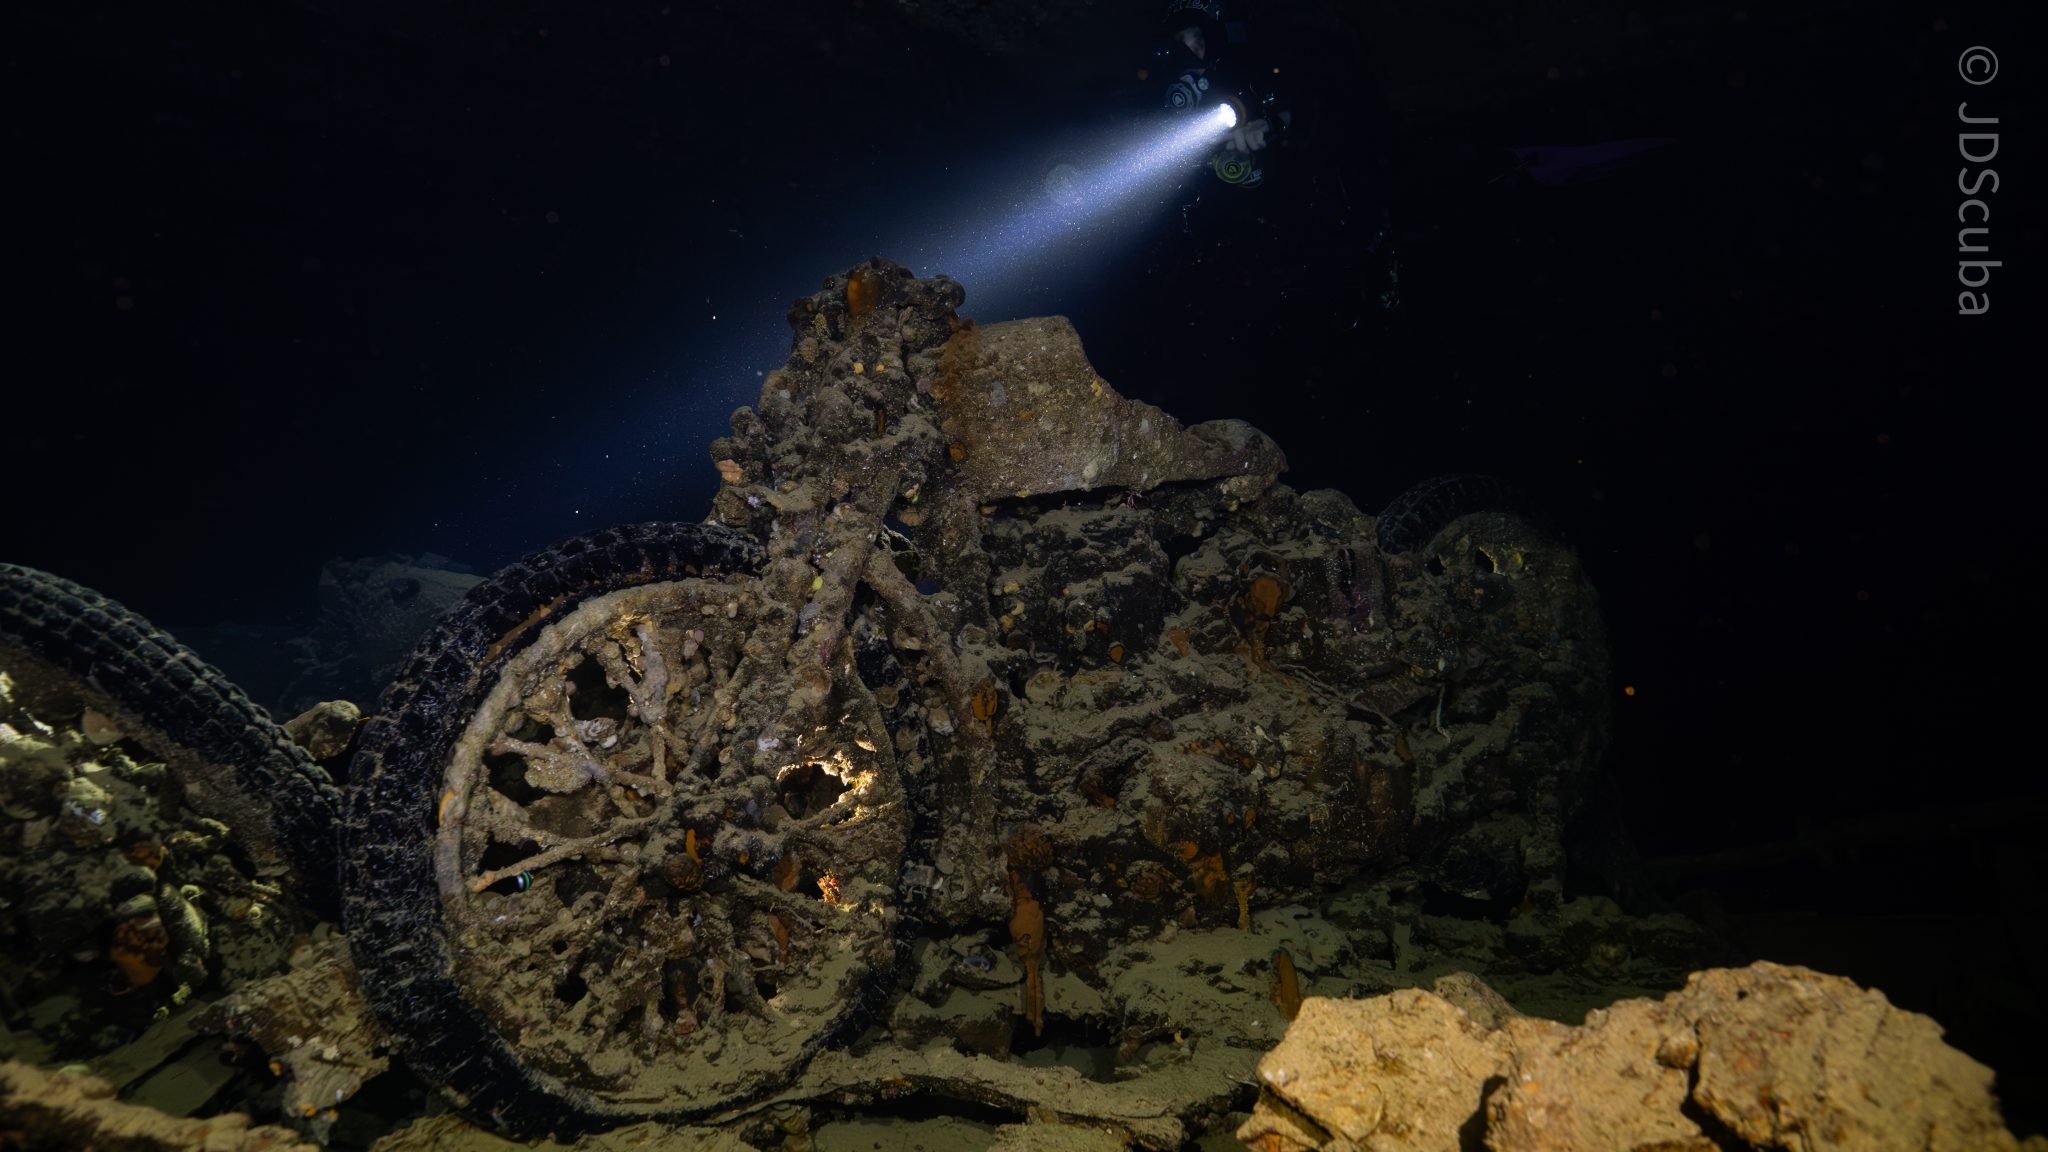
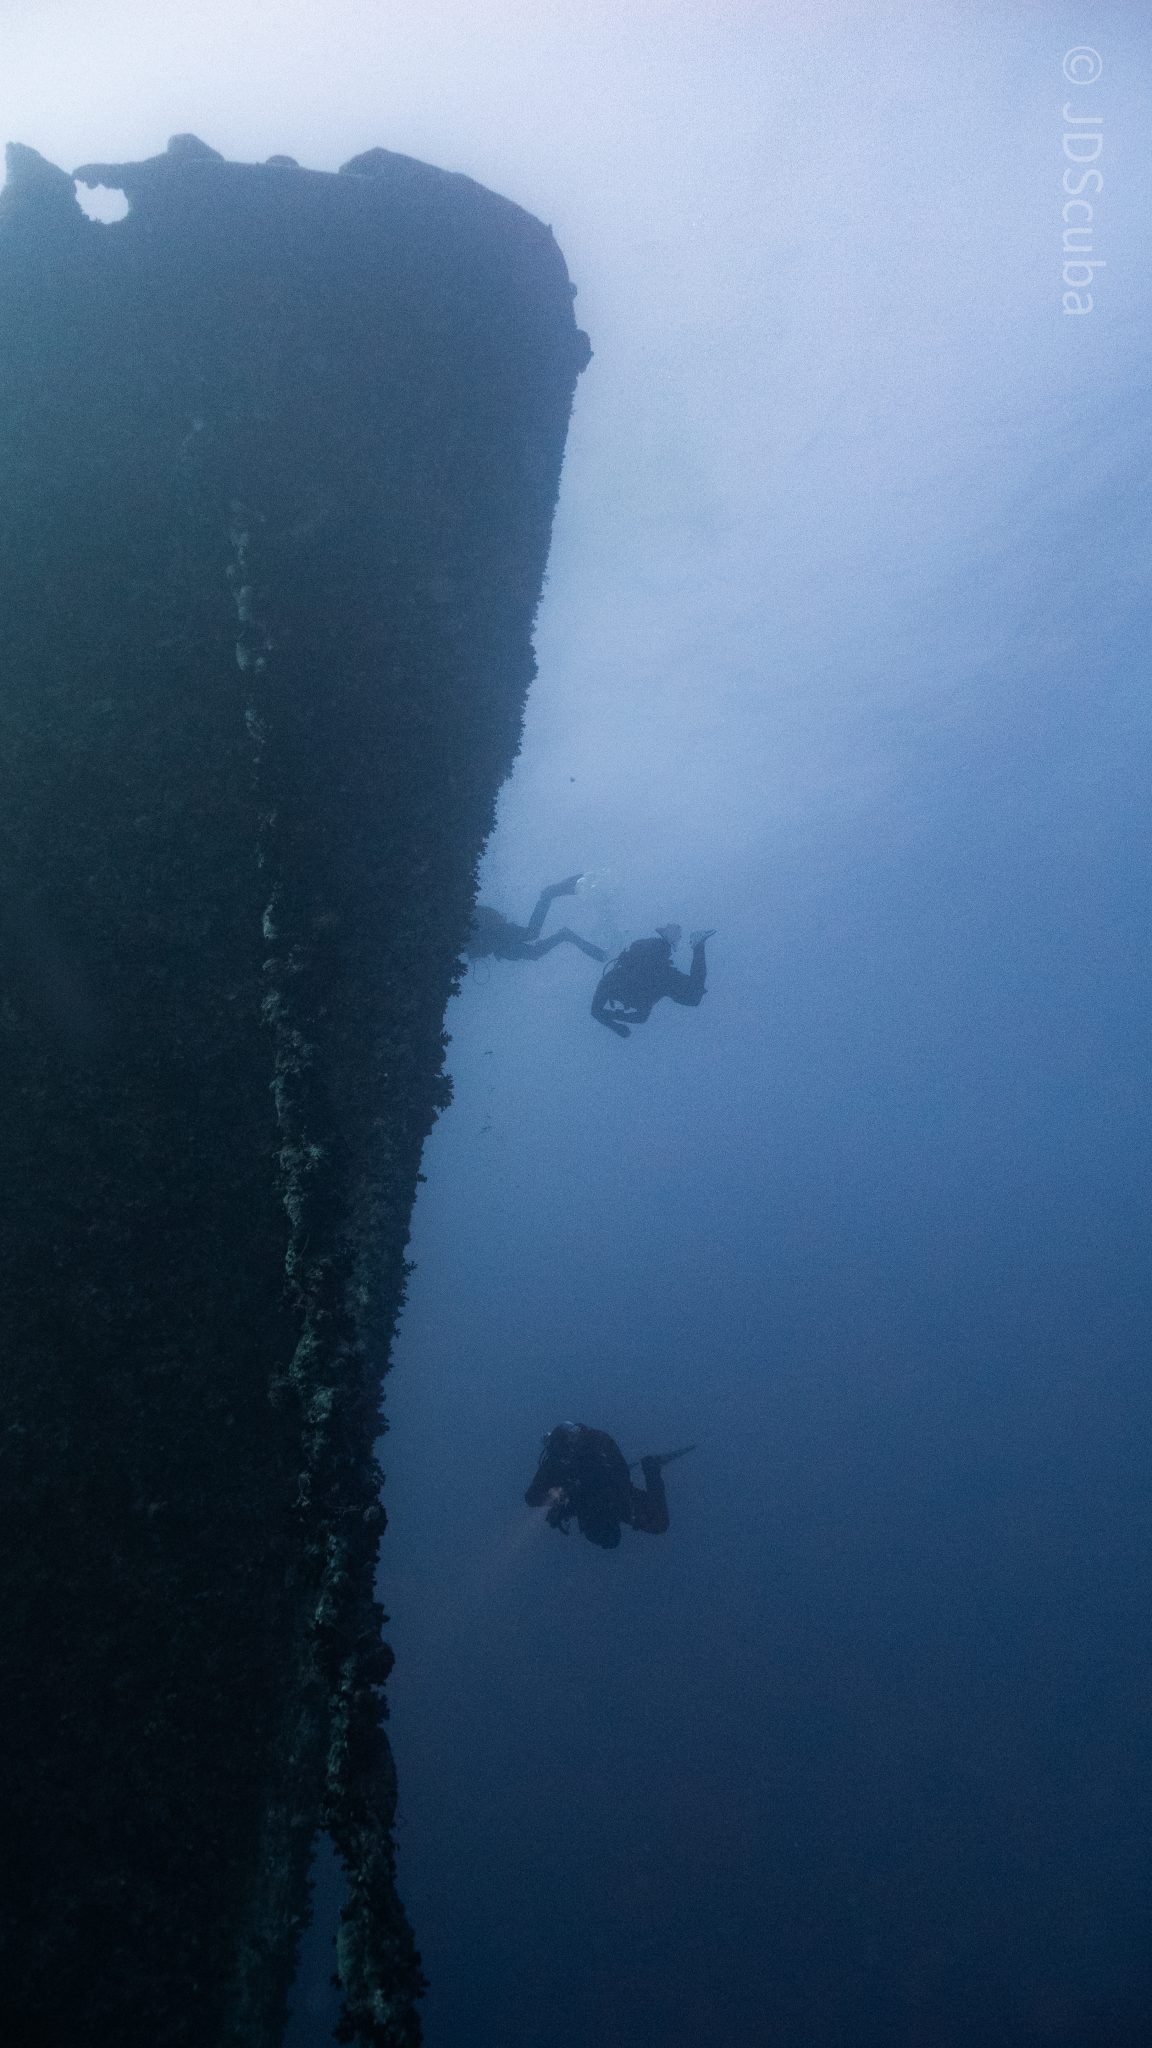
Jake Davies boards Ghazala Explorer for an unforgettable Red Sea diving experience…
Overnight, the wind picked up, making the planned morning dive a bit bumpy on the Zodiacs to the drop point on Thomas Reef. There, we would dive along the reef before descending through the canyon and then passing under the arch before ascending the wall with a gentle drift. The site provided great encounters with more pelagic species, including shoals of large barracuda, tuna, and bigeye trevally.
Once back on the boat, it was time to get everything tied down again as we would head back south. This time, with the wind behind us, heading to Ras Mohammed to dive Jackfish Alley for another great gentle drift wall dive before then heading up the coast towards the Gulf of Suez to moor up at the wreck of the Thistlegorm. This being the highlight wreck dive of the trip and for many onboard, including myself, it was the first time diving this iconic wreck. I had heard so much about the wreck from friends, and globally, this is a must on any diver’s list. Fortunately for us, there was only one other boat at the site, which was a rarity. A great briefing was delivered by Ahmed, who provided a detailed background about the wreck’s history along with all the required safety information as the currents and visibility at the site can be variable.
Kitting up, there was a lot of excitement on deck before entering the water and heading down the shoreline. Descending to the wreck, there was a light northerly current which reduced the visibility, making it feel more like the conditions that can be found off the Welsh coast. At 10m from the bottom, the outline of the wreck appeared as we reached the area of the wreck which had been bombed, as our mooring line was attached to part of the propeller shaft. Arriving on deck, instantly everywhere you looked there were many of the supplies which the ship was carrying, including Bren Carrier tanks and projectiles that instantly stood out.
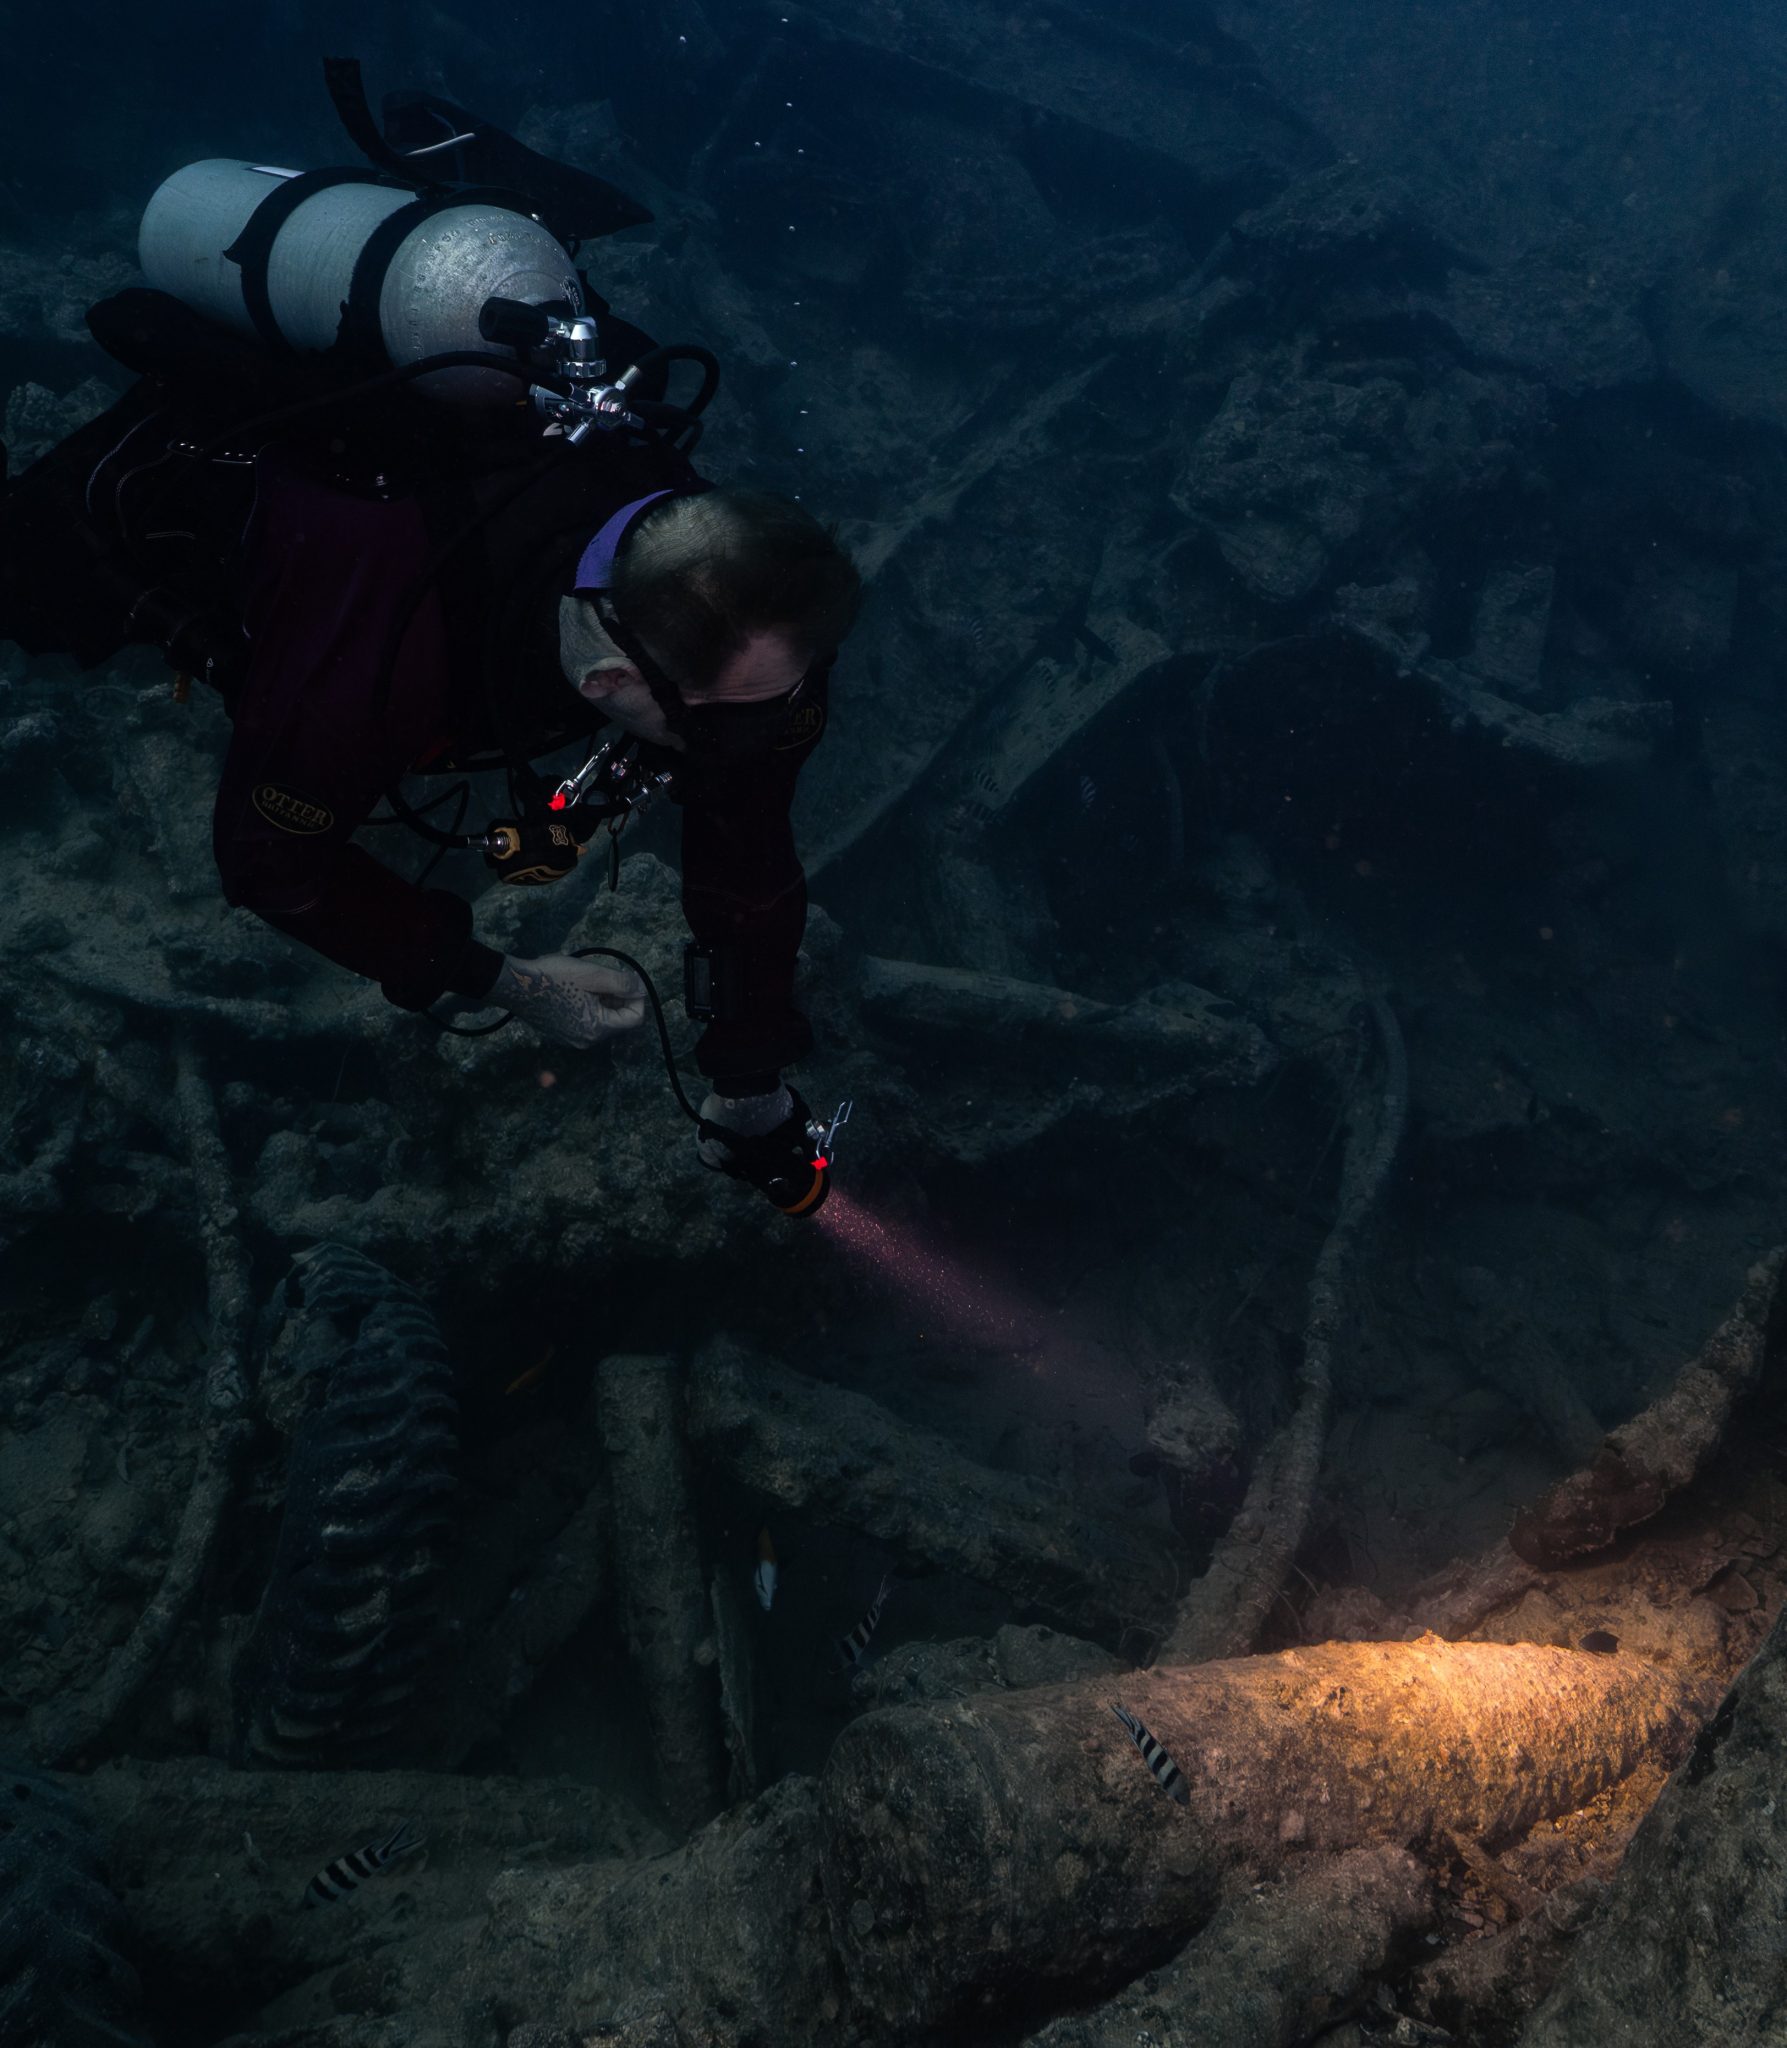
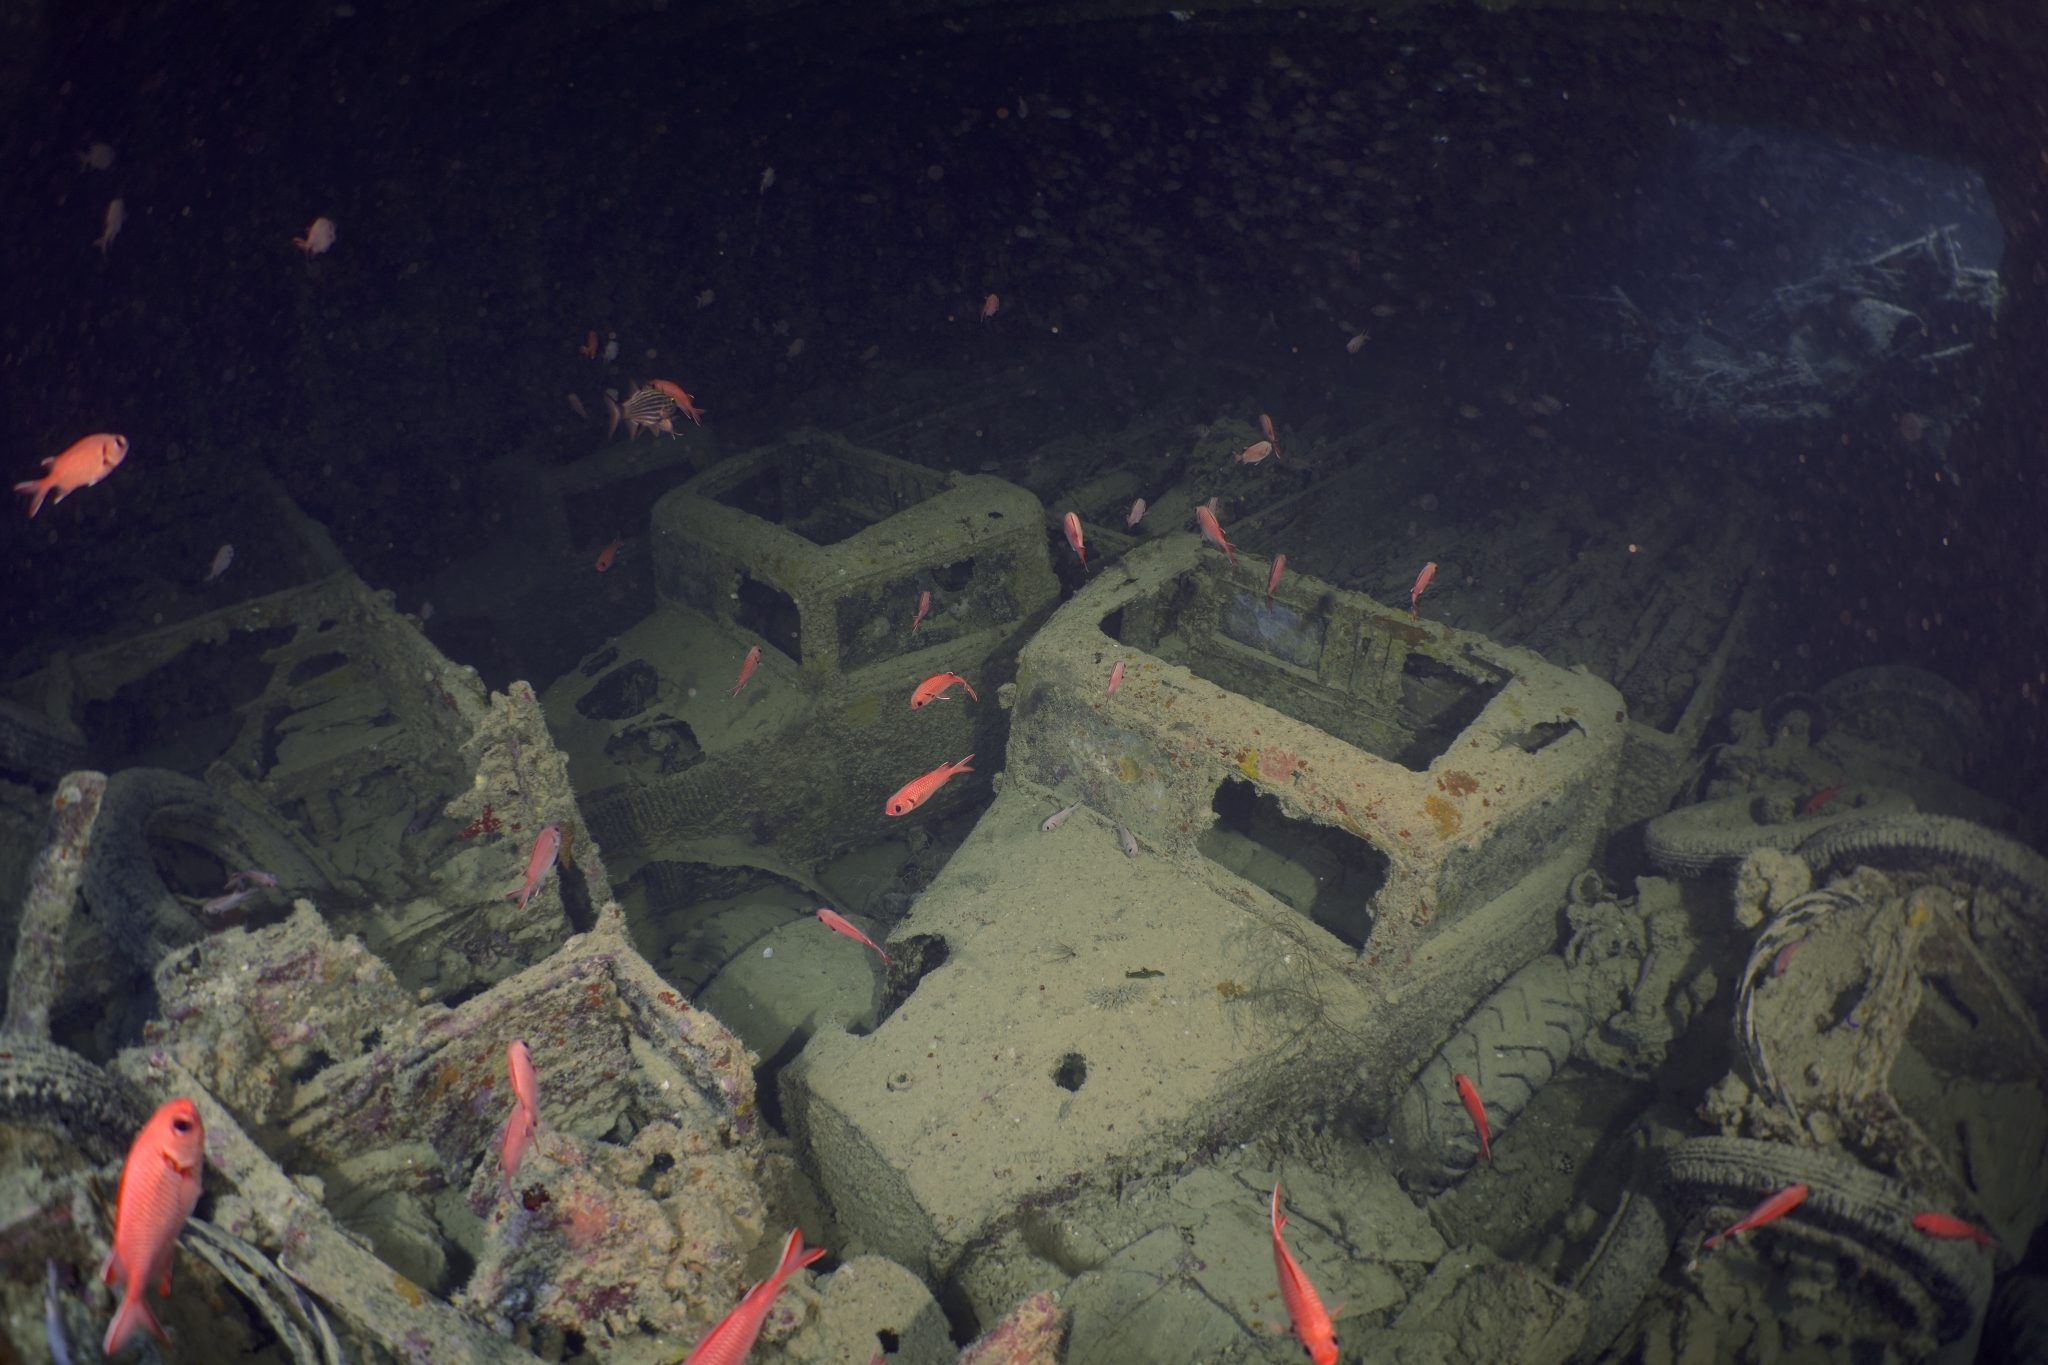
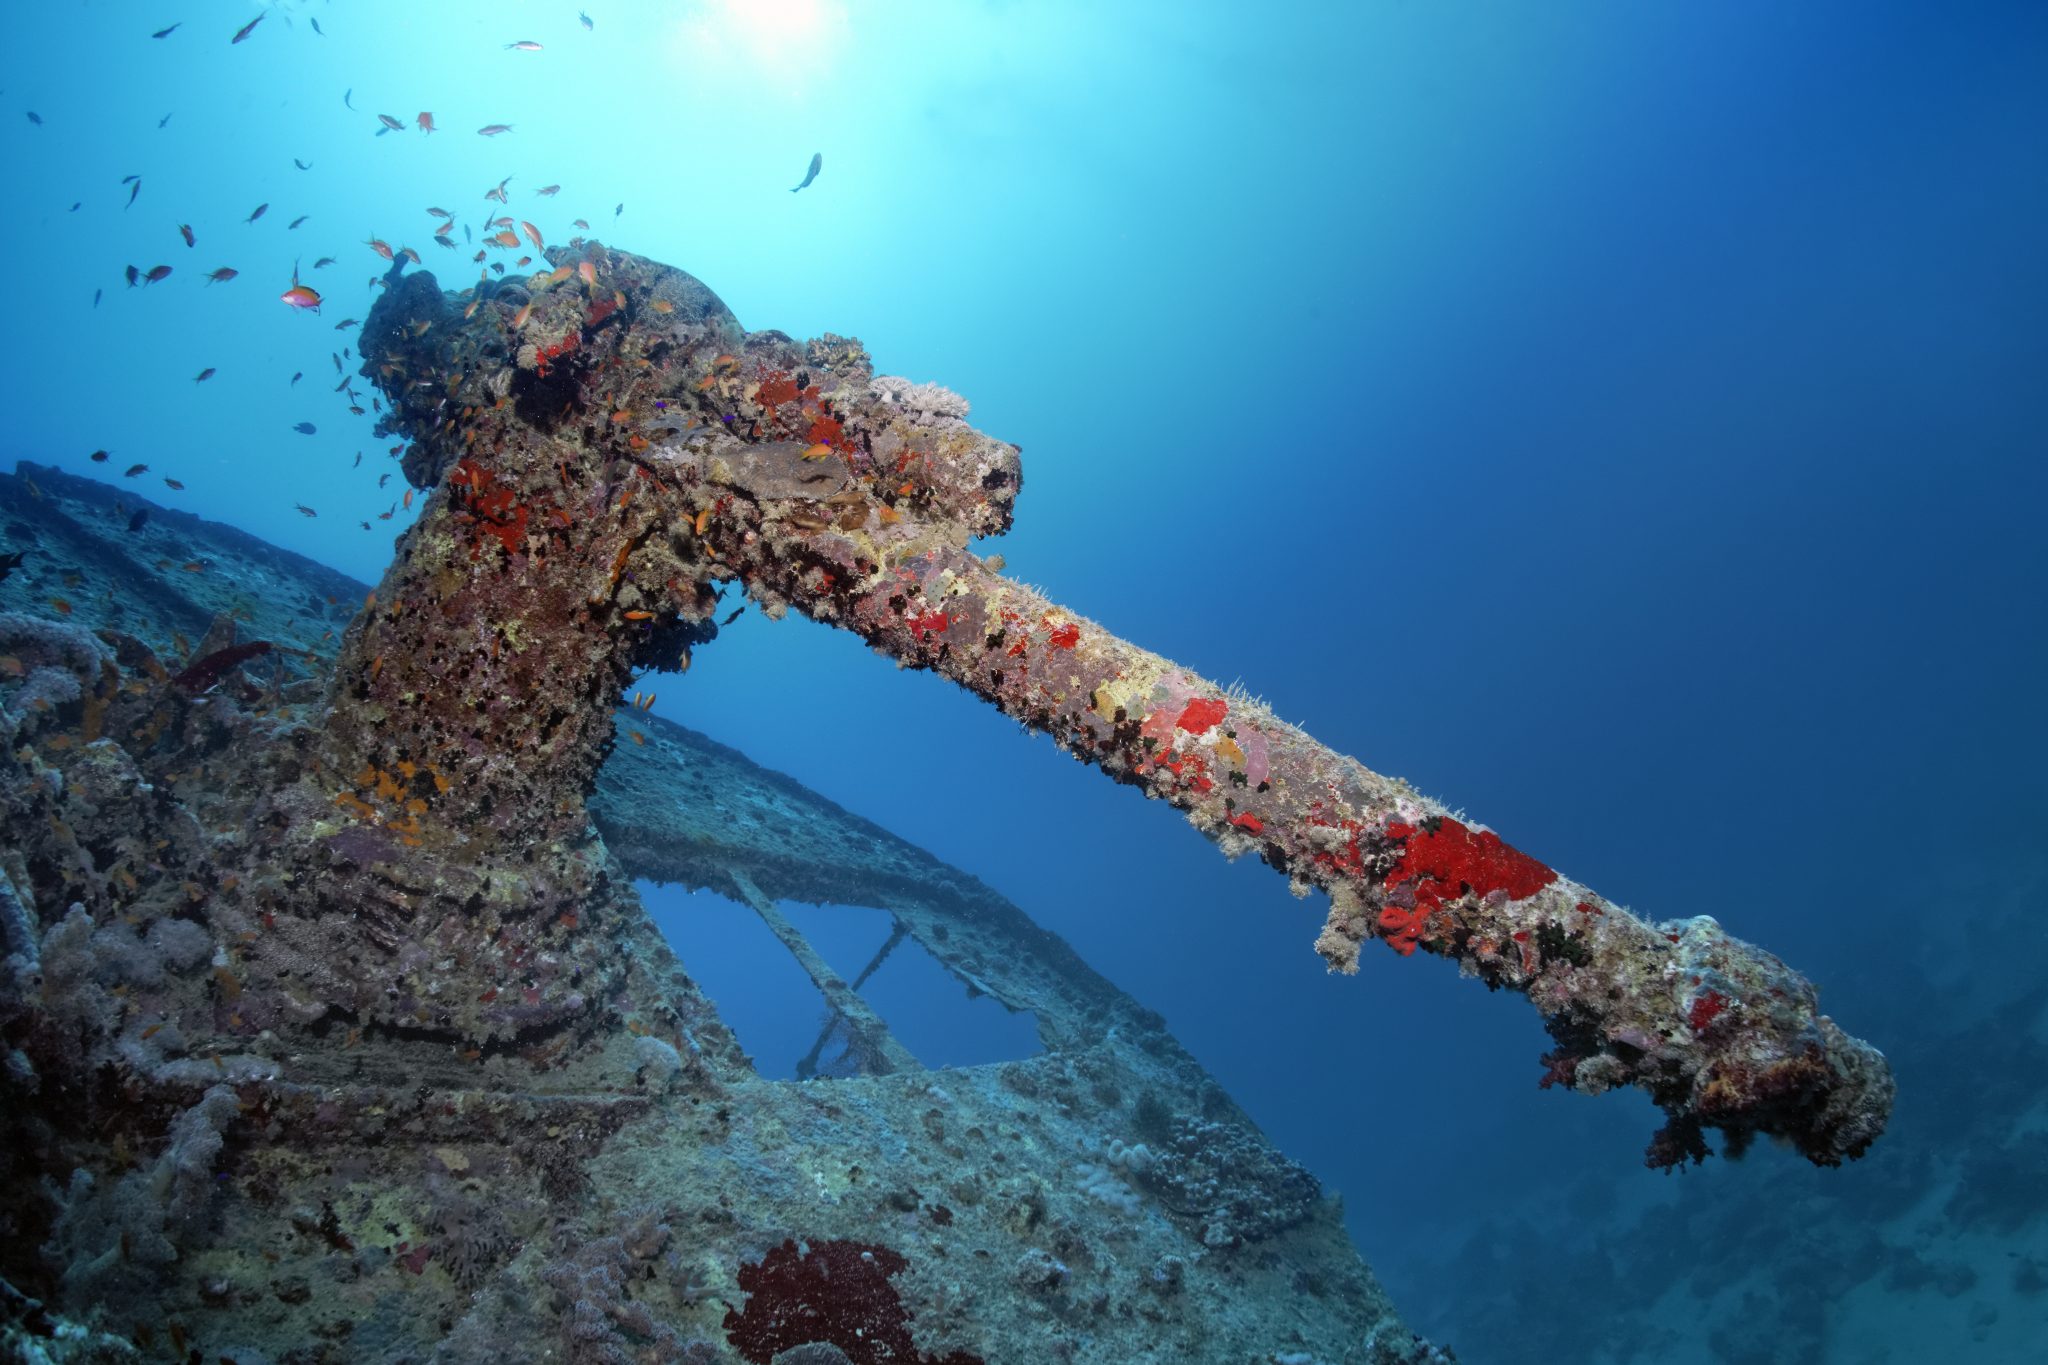
We headed around the exterior, taking a look at the large propeller and guns mounted on deck before entering the wreck on the port side to take a look in the holds. It was incredible to see all the trucks, Norton 16H, and BSA motorcycles still perfectly stacked within, providing a real snapshot in time.

Overall, we had four dives on the Thistlegorm, where for all of the dives we were the only group in the water, and at times, there were just three of us on the whole wreck, which made it even more special, especially knowing that most days the wreck has hundreds of divers. Along with the history of the wreck, there was plenty of marine life on the wreck and around, from big green turtles to batfish, along with shoals of mackerel being hunted by trevally. Some unforgettable dives.
The final leg of the trip saw us cross back over the Suez Canal to the Gobal Islands where we planned to stay the night and do three dives at the Dolphin House for the potential of sharing the dive with dolphins. The site, which included a channel that was teeming with reef fish, especially large numbers of goatfish that swam in large shoals along the edge of the reef. These were nice relaxing dives to end the week. Unfortunately, the dolphins didn’t show up, which was okay as like all marine life they are difficult to predict and you can’t guarantee what’s going to be seen. With the last dive complete, we headed back to port for the final night where it was time to clean all the kit and pack before the departure flight the next day.
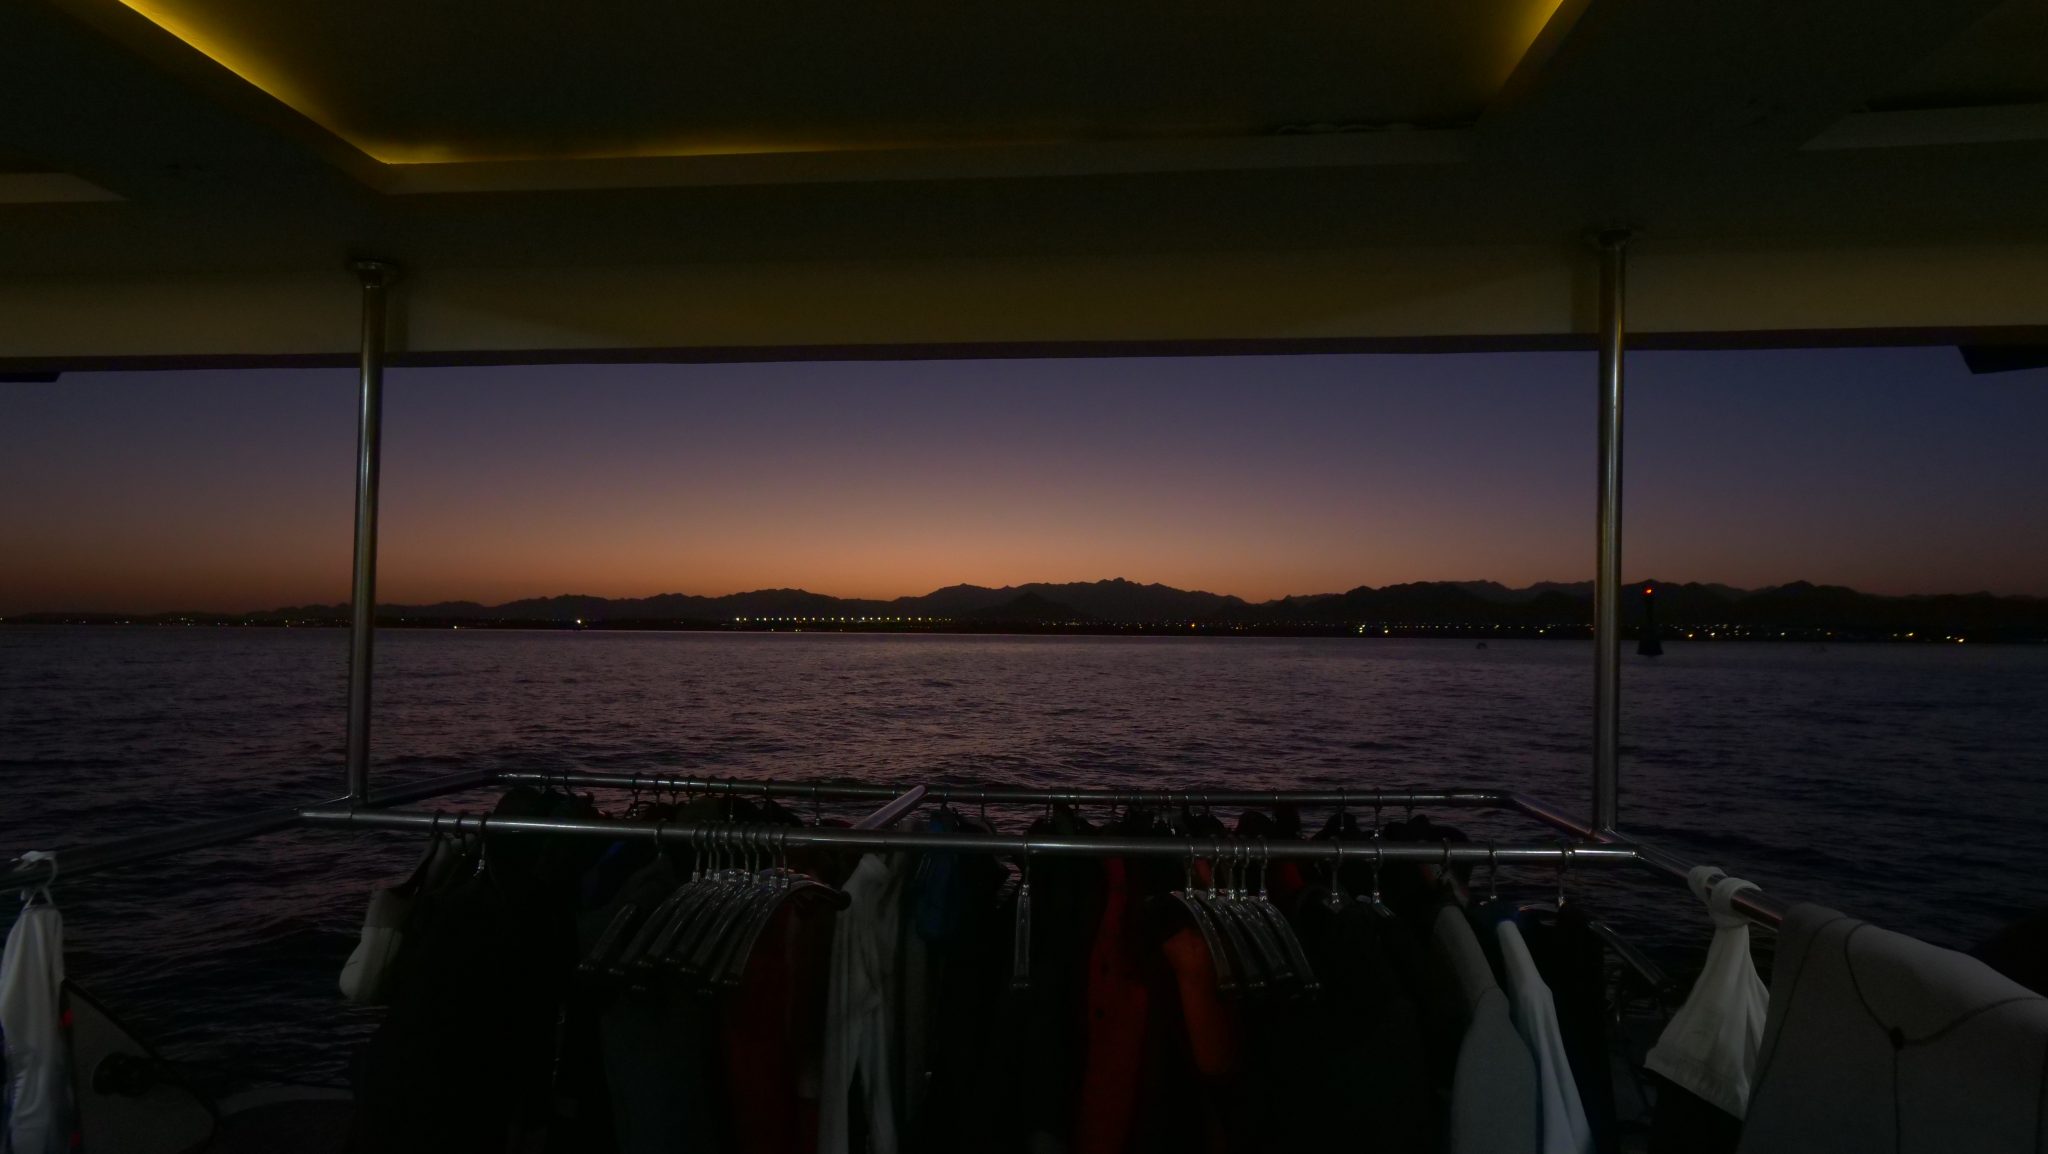
The whole week from start to finish on Ghazala Explorer was amazing; the boat had all the facilities you need for a comfortable week aboard. The crew were always there to help throughout the day and the chefs providing top quality food which was required after every dive. The itinerary providing some of the best diving with a nice mixture of wreck and reef dives. I would recommend the trip to anyone, whether it’s your first Red Sea liveaboard in the Red Sea or you’re revisiting. Hopefully, it’s not too long before I head back to explore more of the Red Sea onboard Ghazala Explorer.
To find out more about the Northern Red Sea reef and wrecks itineraries aboard Ghazala Explorer, or to book, contact Scuba Travel now:
Email: dive@scubatravel.com
Tel: +44 (0)1483 411590
Photos: Jake Davies / Avalon.Red

-
 News3 months ago
Hone your underwater photography skills with Alphamarine Photography at Red Sea Diving Safari in March
-

 News3 months ago
Capturing Critters in Lembeh Underwater Photography Workshop 2024: Event Roundup
-
 Marine Life & Conservation Blogs2 months ago
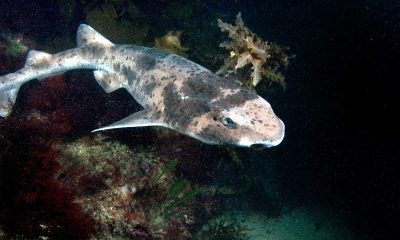
Creature Feature: Swell Sharks
-

 Blogs2 months ago
Murex Resorts: Passport to Paradise!
-

 Blogs2 months ago
Diver Discovering Whale Skeletons Beneath Ice Judged World’s Best Underwater Photograph
-
 Gear Reviews3 months ago
Gear Review: Oceanic+ Dive Housing for iPhone
-

 Marine Life & Conservation2 months ago
Save the Manatee Club launches brand new webcams at Silver Springs State Park, Florida
-
 News3 months ago
World’s Best Underwater Photographers Unveil Breathtaking Images at World Shootout 2023